Labels

Comments

I LOVE comments, so please, if you have an opinion or would like to ask a question, do so. But do check back as I shall answer any questions in the comments of the relevant post - that way, everyone can benefit from everybody's knowledge and advice.
Showing posts with label Soap Making. Show all posts

Tuesday, 27 August 2013

Update - Long Overdue

It has been a really long time since I revisited my site.... and so much has changed.  I thought it would be good to bring my readers up to speed - and my readership is increasing in spite of my not having updated it, so I promise to try and get a new post up more often.


Firstly: I no longer live in the UK.  We moved to a farm in Extremadura, Western Spain where my husband and I grow figs and olives and are in the early stages of trying to get a permaculture food forest going.  We also have a large number of wild flowers and medicinal plants growing here and we are totally organic.  So yes, I am planning on making more soap and more toiletries and perhaps using the medicinal plants from the finca in a productive way.


We also have a yurt.  And a tipee is about to go up as well as a bell tent so we are on track to have visitors soon.


The soap and toiletry making courses.  Alas I gave this up when I left the UK but am now thinking that there will be a strong possibility of my doing something similar here in Spain - combined with a holiday perhaps or a walking or painting holiday (links coming soon to the best alternative holidays ever in this area) with an afternoon or day of messing around with soap.  There are a number of possibilities.


I have not given up making soap or my own toiletries and hair products.  If anything, this has become even more important here in Spain because we have an ecological septic tank and waste water disposal and cannot put any detergents or other 'nasties' down the drain.  I shall be experimenting, especially with olive oil - we now have 150 olive trees and that's a lot of oil!


So please check back with me regularly and if you fancy reading about what we are doing take a look at Technobillies.


Friday, 15 April 2011

Chamfered Edging on Soap

I always keep a stash of soap here....


...under the sink in the kitchen.  I don't make a dedicated kitchen soap, I tend to use it just for hand washing anyway, so the same stuff that ends up in the shower can be found here.


I keep it in a brown paper bag tightly closed to preserve the scent of the soap.  It works very well and these soaps, which have been here for months and months still smell of orange and lavender.

When I ran the soap company I very seldom had complaints about the soap - once when a very ancient old lady whined about the price (she thought £3 a bar was expensive) she compared my soap to Lux and said that it wasn't any different so why was it so expensive. She wasn't convinced by my explanation about the precious oils and the abundance of natural glycerin.  But that's all by the way... the main complaint I frequently had, was from men, and it suprised me.  They did not like the sharp edges on the soap.  Even though I explained that the edges would soon round down with use, they always screwed up their faces and said how awkward it was to use sharp edged soap.


I firmly believe that chamfering the edges of the soap is firstly, a waste of soap and secondly, a waste of your time - but if you want to please the man (men) in your life then perhaps it's worth it.


This is how you do it.  It's best to do this once your soap has fully hardened, so after curing for at least 4 weeks.  Take a vegetable peeler (a speed peeler as Jamie Oliver calls it) and run it along the sharp edge of the soap.


A thin sliver of soap will come off.  Sometimes they come off in great long curls, sometimes they simply shatter into little shards of soap.


You can do all the edges, vertical and horizontal.  Then you take a clean dry cloth ( a T towel is good) and polish up the surface of the soap until it shines.  You don't believe me when I say the soap will shine?  Give it a go and you will see what I mean.


The soap is then ready to be wrapped or displayed for all to see how pretty it is... and how nice to use.  And you can be sure that the man in your life won't have to put up with any sharp edges on his delicate skin!


Oh yes, and because I don't believe in wasting anything... all those little shards and curls of soap that peeled off, don't throw them away.  Put them in an airtight container and the next time you are making soap, when it gets to trace, chuck them in, give it a stir and then pour into the mould.  Sometimes if I had an underweight coloured bar I used to cut it into little cubes and I would add it to a batch of plain soap so that when it turned out it looked like dolly mixtures in the soap.  If you use your imagination you could make some really interesting combinations.  Just scent the main batch as you would normally (don't worry if the shards of soap are from a scented batch or not, they are too small to affect the smell of the final soap) and then chuck in the little offcuts, stir and pour into your mould.

Sunday, 27 March 2011

Viva Espagne!

Ok, so this post is about some iffy soap I made with friends in Spain.  Why was the soap iffy I hear you ask?  Well.  The whole idea was to make something cheap (therefore using local produce) and pure if possible.  The purpose of the soap was to be twofold - a cleaning product for the kitchen as well as something that you could wash your hands with.  This is a tall order as the two are usually completely separate items.

The lovely people who asked me to teach them to make soap were so enthusiastic about the whole project that we simply 'had a go' with the best ingredients that we could find in the village shop.  Sometimes you just have to do it and see what you get.

The only caustic soda that we could find was this stuff.....


It said on the packet that it was 90% caustic soda and 10% 'other ingredients'.  It did not specify which or what other ingredients were included.  I speculated that this could have been bleach or something equally horrid that you would not want to put on your skin.  Would it even turn into soap I wondered? 

The olive oil, the cheapest we could find at the village shop, turned out to be a rather good quality olive oil that I just knew would take some stirring to turn into soap.  But what the heck... lets see what happens.

Firstly I have to point out the deliberate mistake here and say BAD GIRL JANE.  BAD BAD GIRL!!!  Can you see?

I am not wearing safety goggles.  This is a huge NO NO NO!  and I debated whether to do this post at all because of it.  I hold my hands up, it was entirely my fault, my suitcase weighed in at 19.6kg when I was only allowed 20kg on the plane and I had turfed out of the case all my soap making equipment in favour of toys and clothes for my grand daughter.  So I turned the soap making experience into a very dangerous one by proceeding without the goggles.

The first problem we encountered was that the caustic soda did not entirely dissolve.  The nameless 10% was left solid at the bottom of the jug.  I carefully poured only the dissolved solution into the oils.  This means that I actually was unsure how much caustic soda I was using - likely alot less than the recipe called for (recipe given at the bottom of the post).  since I was pretty confident that it would be less caustic rather than more I thought it was worth continuing.


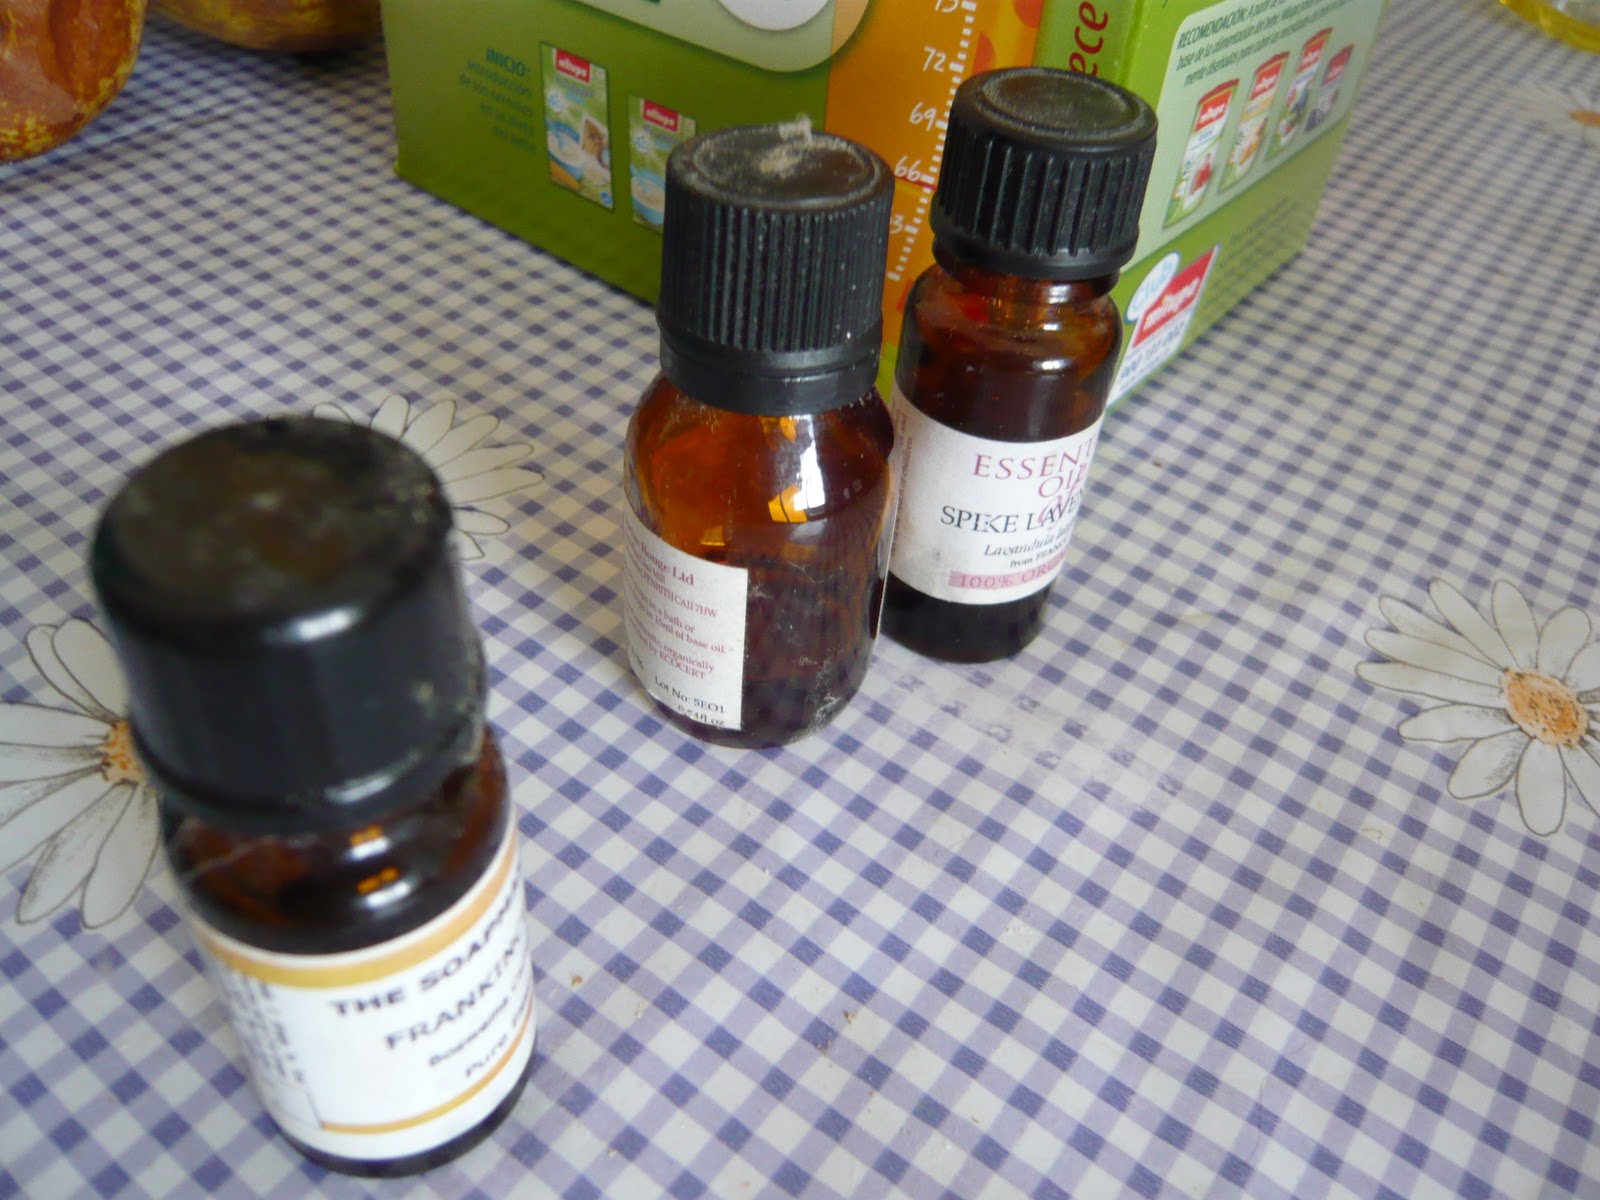
As predicted it took a lot of stirring.  Then we left it still liquid and had a cup of tea, checking back every ten minutes or so to give it a quick stir. After doing this a couple of times it finally started to come together, when it was the consistency of a nice creamy custard (looked just like creamy custard too!) we stirred in some out of date essential oils that my daughter had knocking about the house.  They still smelled lovely even though they were quite old - lavender and sweet orange in equal quantities. 


We poured the mixture into an empty cardboard box that we lined with greaseproof paper and then we set off for the village bar.  After a couple of hours and a couple of beers we came home and checked on it.  It was still quite runny but it was very carefully transported to Angela and Michele's house.  It was then that I realised that I had forgotten to take a photograph of the finished product.  D'oh! (must have been the beer!)


According to Angela it set beautifully by the following morning and they cut it and left it to cure.  They are now in the UK for a holiday so perhaps when they get back they can take a photograph of the soap and let me have it so I can update you all.

This type of all-olive oil soap is traditionally called a Castile soap after the Castile region in Spain where it was first made.  The final test of how good this soap is - whether it will be suitable for using on the skin or left under the sink for washing the floor will be down to Angela and Michele.  They understand that we don't really know what was in the caustic soda, or if we managed to screen out the 'bad' bits or not.  At the end of the day, if it is used solely as a kitchen cleaner, it is still going to be the cheapest kitchen cleaner you could ever buy... costing only a couple of euro's to make. 

The recipe we used:
1 litre Olive Oil (cheapest we could get)
275g water (weighed)
127g caustic soda

10ml Essential oil

Sunday, 7 November 2010

Essential Oils? Are they really Essential?

What are Essential Oils?

Essential oils are chemically very complicated. The substance is not really an oil at all. It is a volatile extraction from organic matter. If you spill some sweet almond oil onto your best blouse, you are going to have an oil stain... and it could be difficult to get it out in the wash. If you spill essential oil, it evaporates into the air leaving no sign that it was there. Mind you some of them are very dark coloured and I haven't actually tested those, in theory it should be the same, but certainly a lavender or a rose simply evaporates into the air leaving no stain whatsoever.

Essential oils contain within them the 'essence' of the plant from which they were extracted. Mother Nature has so cleverly provided us with, not only the illness, but the cure too, and sometimes both are combined in the same plant. The skill of the aromatherapist, as with the herbalist, is in understanding which plants and flowers do what.

Many of our modern day medicines were originally synthesised from plants, aspirin for example is found in the bark of the willow tree, nowadays of course aspirin is synthesised in the laboratory... but in it's natural form, it is much more complex and it's effects upon the body perhaps more subtle. Plants are a very complex concoction of chemicals which in their entirety we are unable to reproduce synthetically, so we tend to isolate the chemicals that we believe hold the cures... and concentrate on making our modern drugs from these. Where aromatherapy wins out over modern medicine is in harnessing the therapeutic value of the WHOLE plant. However... the extent of the therapeutic value is still not fully understood - and little in the way of serious research is done into this field - apart from studies by aromatherapists themselves, science and modern medicine is so hung up on the synthetic that almost no serious scientific study has been done.  Exceptions to the rule are evident in the form Mme Tisserand but I speak in relative terms when you compare with the amount of research done on conventional medicines.

The most important thing to remember, if you are not an aromatherapist, is that not all natural things are GOOD for you. You would not wish to play fast and loose with a Belladonna tea. You should therefore not be Gung Ho with the essential oils of plants and flowers.

If we are still a little in the dark about the full extent of these oils therapeutic values then how do we know...

How (and if) Essential Oils Work?

At first thought how essential oils work is a bit of a mystery. But then if you think back to your own experiences involving smell you will very soon see how it is possible. Have you ever smelled something that instantly took you away to a time in the past or a place you have visited and forgotten all about? The memory becomes very powerful when evoked by a smell. Or perhaps you have comforting feelings when you smell the perfume your granny wore... or home baked bread. Equally smells that you dislike can make you feel anxious or nervous... the smell of the dentists perhaps, or hospitals.
Smells work in this way by stimulating the olfactory nerves at the back of the nose which send messages to the olfactory centre of your brain. This particular area of the brain is responsible for our basic drives such as sex, hunger and thirst. It is also where the pituitary gland and hypothalmus are sited. These two regulate hormone release - which is connected with the control of many bodily functions along with emotions and memories. This is the short and simple guide to how aromatherapy (the inhalation of organic essences) can have a direct affect on our physical well being. When massaging with essential oils they are absorbed directly into the body and into the bloodstream. Likewise if you have used them in a homemade beauty recipe, a moisturiser for example, you are introducing small quantities of essential plant extract into your body - perhaps on a daily basis. It is important therefore to get it right... or at least...not to get it wrong.

Aromatherapy Soap?

I have certainly used this term myself when selling natural soap which included essential oils. I was however always quick to point out that there was no proof that essential oils in soap will have any therapeutic value at all. Why? Well firstly, soap is a wash off product. We are basically waterproof anyway and the whole function of the soap is that it will latch onto the dirt and oil on our bodies and whip it away down the drain.
Secondly, the soap making process is very harsh. We are using Sodium Hydroxide and quite high temperatures - over which we may not have any control... especially if your soap gels in the mould.

If the essential oil does not burn off during the initial soap making process (and this is why we use such large quantities in soap making - sometimes up to 3%), sometimes the finished smell is not quite what you expected. It has been altered by the process. If it is going to have any therapy value it will be in the smell - but I can't be sure that it the end result is what an aromatherapist would expect from that particular oil.
So, for soap making I always choose cheaper essential oils. This does not mean that my soap is a lesser product. It's a question of raw ingredients fit for purpose rather than of quality. Similarly if I am making a night cream for my mother-in-law I will always use an organic essential oil from a reputable supplier.

And this brings me to the essential oils suppliers. It is very easy for us to be fobbed off by poor quality oils sold at premium prices and not to know the difference. How would we know the difference? I have known aromatherapists rave about a particular oil until they smelled the same oil from another supplier... and even then... plants are natural things... what they do one year, they may not the next. Each batch of oil will be subtly different from the last. And the difference between lavender from different suppliers can be astounding! You need to find an essential oil supplier whom you trust and be guided by his/her advice as to purchasing the correct product... i.e. tell them that you are making soap, or that you are wanting to use it in a massage bar (Oooh yes, massage bars - recipes coming soon!) and they will be better placed to advise you which grade of oil to buy. Hint If you are unsure, order a very small quantity, the smallest you can and then be guided by your nose, if you like it... ask for a bigger quantity from the same batch.

Wednesday, 13 October 2010

The Practical Soap Course


Learning to make soap is not that difficult. There are numerous books and other blogs with tutorials but some people learn better with a practical hands on demonstration. The pouring of the sodium hydroxide into the water always makes students think twice about tackling it on their own the first time. And it is true, you cannot be complacent about safety. If you are one of those who would prefer to have someone more experienced watch over you the first time you make soap then this could be the answer.

This is a low-budget option for those people who feel able to learn the theory from course notes or a book. The practical soap course will teach you how to be safe while making soap and provide you with free recipes to get you started. You will watch a demonstration of soap making and then have the opportunity to make a small batch of soap yourself under the supervision of an internationally acclaimed soap maker. The course assumes that if you wish to tailor recipes you will have to do some research on your own. The course runs on a week day from 9am to 1pm (ish) and costs £40 per student. No lunch, although tea/coffee and juice will be provided during the morning. Maximum of 4 students per session - booking is essential.

Friday, 8 October 2010

Using Pigment Colours and Colouring Techniques

Clays: Cosmetic clays are wonderful soap additives and come in various colours and including them in the soap mix will add a small amount of texture as well. It is recommended not to use more than 1 – 2 tablepoons of clay per kilogram of oils, however you need to be guided by your own tastes.

Oxides: Oxides are very common soap additives that you can purchase from specialist soap ingredient suppliers. Although oxides are more stable than plant dyes, they do still have a tendancy to fade in strong sunlight. The end colour result is also affected by the colours of the ingredients in your soap. For example if you are using a very green coloured olive oil this may inhibit a true blue oxide from producing a very blue soap.

Amount to use: Once again this depends upon the depth of colour you are looking for in the final product. Anything between ¼ tsp up to 2 teaspoons per kg of oil would be a good starting point.

A note about synthetic pigments These soap additives are definitely NOT natural, but they are very stable and provided you can measure exact amounts will always produce the same colour in the same formula. Since only very, very small amounts are required this can be difficult to measure when making small batches. These soap additives have no real place in with the other natural options listed above, but since they are very popular with soap makers and the nature of soap is to wash off - there is little chance of any component of a synthetic coloured soap additive being absorbed by the skin. The synthetic colours or lakes as they are often called are mixed with oil – never used in water soluble products and always used very sparingly. Lakes are Inorganic pigments, and do not usually bleed or leach colour.

There are 4 types of Lakes: Calcium Salt, Barium Salt, Aluminum Salt and a Sodium Salt. The colour from the dye is placed onto one of these as an insoluble base to hold the colour onto. Which Salt is used is determined by the colour they want to achieve, as the Salts impact on the result. Some lakes are also Rosinated. Rosin is derived from tree sap and gives a blue tone to reds.

Amount of coloured soap additive to use: 1/8 teaspoon per kg of oils. (for measuring tiny amounts use the end of a spoon handle).

Colouring Techniques

Solid Coloured SoapOnce you have chosen your colour and have prepared it accordingly you only need to add it to your batch of soap and mix well to obtain a uniform solid coloured soap. You may wish to add it at a light trace in order to give yourself plenty of time to mix it in properly before the soap starts to set up.

Layering
A two coloured or layered soap can be achieved by splitting your formula in half and making one half of the batch up to an hour before the other. Make the first half of your formula in one colour and pour the soap. Insulate as normal for at least one hour. Prepare the other half of the formula and colour it a different shade. Pour this half of the formula onto the top of the insulating soap and then recover and leave for the full insulating period. So long as you pour the next layer of soap on top within the hour the two separate batches will stick together. If you leave it longer there is a good chance that they will separate.

SwirlingThere are several ways to swirl. The key to success however is in judging the level of trace so that the coloured soap suspends within the main batch. Using synthetic fragrances in a swirled soap adds an extra dimension of difficulty since they often accelorate the rate of trace. It is definitely advisable to begin swirling only those soaps that contain essential oils.

Swirling Technique a:When your soap has reached a light trace pour about a quarter of it into a separate container. Mix the essential oils and any other additives required with the remaining soap and then pour into the mould. Now add the colour to the quarter of soap you have left out and mix well. Pour this soap onto the soap in the mould in straight lines forming a grid pattern (a bit like naughts and crosses game) vary the height at which you pour the soap so that it falls right through to the bottom of the mould in places. Now take a knife or spatula and holding it upright trace lines through the soap running in the opposite direction to the grid pattern already made with the contrast colour. Cover the soap and insulate as normal.

Swirling Technique b: When your soap has reached a light trace pour about a quarter of it into a separate container to which you add the colour. Add the fragrance to the main soap pot. Return the coloured soap to the main soap pot and then swirl once with whisk or spatula. Pour the soap into the mould, cover and insulate as normal.

Swirling Technique c: When your soap has reached a light trace pour about a quarter of it into a separate container to which you add the colour. Add the fragrance to the main soap pot, stir and then pour into the mould. Stir the colour into the soap in the separate container and then pour this into a nozzled plastic ketchup container. Use this to swirl the coloured soap into the main batch. With this method you can get some very specific and delicate lines of colour throughout the soap. Finally cover and insulate as normal.

Natural Colourings for Soap

Finding natural soap additives can be as simple as rifling through your kitchen cupboard. They are usually cheap and easy to find. And because they are natural, there is always the possibility of an unusual outcome!

Even though some of these additives have a strong smell in the raw... once they have been through the rigorous soap making process there is usually no trace of the scent!

Different natural ingredients can produce varying colours by infusing specific plants, flowers or barks in the soap making ingredients. But I warn you, the colours are never startling or really bright. The best that you can expect from natural soap additives is earthy, sludgy, natural looking colours.

Don't necessarily stick to the traditional method of adding the natural colourant at trace. Try infusing the plant in the lye to see what kind of colour you get, or infuse in the base oil at the start. The result may only be subtley different, but equally it could be very different.

This soap has been coloured with carrot juice.

HERE ARE SOME SIMPLE, NATURAL COLOUR ADDITIVES FOR COLD PROCESSED SOAP

Alkanet Root (Alkanna tinctoria)Colour: varies from red through lavender to blue. Alkalinity affects the shade obtained. Alkanet comes as a dried root which should be infused - it is often called natures litmus paper since it turns shades of dark blue in an alkaline environment and shades of red or pink in an acid environment. Because of the natural alkalinity of soap it is very unlikely that you would ever get pink soap from it.

Annatto Seed (Bixa orellana)Colour: varies from Orange to YellowAnnatto comes as dry beads which should be infused in warm oil or lye.

Carrot Juice colour: varies according to how much juice is used... from yellow to orange. Replace some or all of the water content of the recipe for freshly juiced carrots.

Cinnamon (Cinnamomum zeylanicum, Cinnamomum cassia)Colour: warm brown tones.This is the spice we all know from the kitchen. It can be used whole and infused in the oils (I have never tried it in lye) or the powdered variety mixed with a small amount of soap and added to the whole pot at trace.

Cocoa Powder (Theobroma cacao)Colour: warm brown tones.Again this is the stuff we make chocolate drinks from. It is best mixed with a small amount of soap and added to the pot at trace. Like the cinnamon, the effect is often a bit speckly.

Elderberry (Sambucus canadensis)Colour: Berries produce a caramel colour, flowers a soft yellow.Infuse the dry flowers or berries in the lye solution, there seems to be very little extraction of colour by infusing in oil - but this may be because I didn't leave it long enough.

Madder Root (Rubia tinctorum)Colour: pinky red.Madder can be infused in both lye or oil. The main reason many people reject madder is because it contains a substance known as anthraquinones. In small quantities these are used in the treatment of some cancers, however in large quantities they can cause cancer. In reality, you are unlikely to ever use enough of this soap additive for it to have any adverse effect upon your body (especially since soap is a wash-off product).

Paprika (Capsicum annum)Colour: Speckled pink.Yep... this is paprika pepper from the kitchen. Don't use too much as it could produce 'heat' on the skin (outside chance). It should be infused in a little oil and added to the soap at trace.

Rose Hips (Rosa canina, Rosa arvensis, Rosa rubiginosa)Colour: Pink to tan.Rose hips are usually bought ready powdered but if you are planning on preparing your own, dry well first, then ground to a fine powder. Add this to a little soap and return to the main batch at trace.

SpirulinaColour: blue-greenMethod: Add at trace.Add the spirulina to the lye solution or to the soap at trace. It is possible to use too much and give your soap a distinctly 'seaside' smell to it. This does fade over time.

Turmeric (Curcuma longa)Colour: Peach to OrangeAdd to a little of the soap at trace and return to the main batch.

Amounts of soap additive to use:

This is purely a matter of preference, after all, how much colour you wish to see in the final bar of soap? – bear in mind that natural colours will eventually fade out totally and large quantities of spices added at trace could be irritating to the skin.

I would start with approximately 30grams of plant material per kg of oils or 20grams of spices per kg of oils. Keep careful notes and increase or decrease as desired for future batches.

Producing Colour from Plant Material

Firstly you can't add fresh plant material to the soap mixture. Even hot process soap - which in theory has already cooked out the sodium hydroxide - will turn fresh plants or flowers, petals etc. into a horrid black mush after a very short time. You must always dry any plant thoroughly before considering adding it to the soap. Many plants or flowers when dried will add a decorative touch to the soap but the ones we are talking about here will add colour too.

In order to extract the colour from the plant you need to infuse it. This involves placing a quantity (?how much... how long is a piece of string?) of the plant into warm oil or warm lye solution. This should then be left for a while (?how long... again, how long is a piece of string?) until the colour has leached into the oil or lye. This oil or lye can now be used in the soap recipe.

I am sorry that I can't give you exact times or quantities, but the finished effect is down to you and your experiments - this is what makes soap making so fascinating, and so individual.


soap coloured using powder pigments - watch out for my post on these coming next!

Aromatherapy Soap?


I have certainly used this term myself when selling natural soap which included essential oils. I was however always quick to point out that there was no proof that essential oils in soap will have any therapeutic value at all. Why?

Well firstly, soap is a wash off product. We are basically waterproof anyway and the whole function of the soap is that it will latch onto the dirt and oil on our bodies and whip it away down the drain.

Secondly, the soap making process is very harsh. We are using Sodium Hydroxide and quite high temperatures - over which we may not have any control... especially if your soap gels in the mould. If the essential oil does not burn off during the initial soap making process (and this is why we use such large quantities in soap making - sometimes up to 3% of the base oils), the final smell is not always quite what you expected. It has been altered by the process. If it is going to have any therapy value it will be in the smell - but I can't be sure that it is what an aromatherapist would expect.

So for soap making I always choose cheaper essential oils. This does not mean that my soap is a lesser product. It's a question of raw ingredients fit for purpose rather than of quality. Similarly if I am making a night cream for my mother-in-law I will always use an organic essential oil from a reputable supplier.

And this brings me to the essential oils suppliers. It is very easy for us to be fobbed off by poor quality oils sold at premium prices and not to know the difference. How would we know the difference? I have known aromatherapists rave about a particular oil until they smelled the same oil from another supplier... and even then... plants are natural things... what they do one year, they don't the next.

Each batch of oil will be subtly different from the last. And the difference between lavender from different suppliers can be astounding! You need to find an essential oil supplier whom you trust and be guided by his/her advice as to purchasing the correct product... i.e. tell them that you are making soap, or that you are wanting to use it in a massage bar and they will be better placed to advise you which grade of oil to buy. Hint If you are unsure, order a very small quantity, the smallest you can and then be guided by your nose, if you like it... ask for a bigger quantity from the same batch.

ABOVE ALL, BE GUIDED BY YOUR NOSE!

This is very important.YOU must be the judge. Your nose must be the one to say if it is good or not. Don't worry if you think you have a poor sense of smell. The more you use your nose to smell different things the better it gets at smelling. Do not be tempted to use more than the recommended amount in your product. And be aware that some oils have side effects (e.g. making your skin more susceptible to sunburn) and these should be taken into consideration. But most of all... do lots of sniffing and have fun.


Bishop's Balm Soap


This is one of my soap making recipes inspired by the medieval monks who used comfrey in their healing poultices. It is not likely that they would have used it in soap, or sunflower oil and they certainly would not know about coconut oil but the beeswax in this recipe helps keep the bar nice and hard and the sunflower adds a lightness to the lather. When I first made this soap back in 2003 I scented it with two parts Bergamot to one part Lavender - you can, of course, choose whichever scent combinations you desire - or leave it unscented, as you wish.

Ingredients:

Coconut oil = 300grams

Palm oil = 250grams

Sunflower = 350grams

Beeswax = 50grams

Green Comfrey Oil = 25grams

Water = 300grams

Sodium Hydroxide = 134grams

Don't forget the basic safety instructions.

Follow instructions for making the basic beginners soap with the following additions: Melt the bees wax with the base oils and then let the oils cool to about 45 degrees celcius or at least until the mixture becomes a bit thick and soupy. The bees wax in this soap helps speed up the rate of trace, however the sunflower oil takes longer than olive to come to trace so you may find the two cancel each other out and the mixture will behave itself - however be prepared to work fast just in case!

The Comfrey oil should be added to the soap at trace, just before pouring into the mould. There is a concern in soap making recipes about using too high a percentage of sunflower oil, since sunflower oil is prone to early rancidity - I never had any problems with this particular recipe but then I can't say for sure since it was always used well before the two years from manufacture date.

If you would like to add essential oils to this recipe then do feel free to experiment with blends or single oils that you think would be appropriate. On average I would add 2% of the total of the base oils in the soap making recipe as fragrance or essential oil. Be guided by your nose though, if the essential oil you choose is very strong then you may wish to add less. For this recipe that means 19grams - although not entirely accurate I would use a 20ml bottle of essential oil or blend to a total of 20ml in a small measuring container.

To Vary

Continuing the trend for medieval inspired soap (I have a whole load of these, our village used to have an abbey, sadly one of the abbeys and monasteries abolished by Henry VIII, which celebrated it's millenium in 2005 - for this event I created a number of medieval-styled soaps)

Take the same recipe and blend with the soap mixture a heaped tablespoon of green or yellow clay. Don't hang about before getting this into the mould though... it gets thick quite quickly! A sprinkling of ground olive stones, or powdered strawberry seeds will give this soap a gritty dirt-busting texture - but remember less is more in this instance... only a teaspoonful or less is required for this quantity of soap.

This Oxford Gargoyle soap comes from a specially commissioned silicone mould. It's a one-off which cost quite a bit at the time but makes wonderful gifts.

Suggested Essential Oil Blends for Soap


strong or Masculine Blends

Ginger = 3 parts

Frankincense = 8 parts

Bergamot = 8 parts

Juniper = 2 parts

Geranium = 3 parts


Cypress = 2 parts

Juniper = 4 parts


Mandarin = 2 parts

Juniper = 3 parts


Delicate non-flowery Blends

Sandalwood = 2 parts

Rosewood = 3 parts


Peppermint = 2 parts

Lavender = 3 parts


Cedarwood = 2 parts

Lavender = 3 parts


Geranium = 4 parts

Patchouli = 1 part


Feminine Scents

Ylang Ylang = 2 parts

Geranium = 3 parts


Shampoo Bar Blends

Rosemary = 6 parts

Lavender = 4 parts


Lavender = 6 parts

Geranium = 4 parts


Tea Tree = 2 parts

Rosemary = 4 parts

Lavender = 4 parts


In general the citrus oils do not hold well in natural soap - you can try anchoring the light citrus smell by the inclusion of a more base note oil - however this then changes the citrus smell somewhat. If you want a true citrus smelling soap you will need to look at using a fragrance oil. See my post on Fragrance Oils vs Essential Oils. Sometimes you can get the volatile top note citrus smell to linger for longer by anchoring it to a deeper note such as the following: (Mind you they no longer smell like true citrus scents)


Orange = 4 parts

Lavender = 4 parts

Geranium = 2 parts


Lemon = 4 parts

Cedarwood = 2 parts

Cypress = 4 parts

The type of base oils and the method you use for soap making will have an effect upon the final scent of your soap. This is all part of the fun of making soap.


All Olive-Oil Soap (Castile)


This is one of the most simple soap making recipes, but not always the most simple to make, however don't let that put you off. It is worth having a go since this is a very gentle soap that I recommend using on your face.

The Castile soap making recipe is considered one of the most inoffensive soaps and is often recommended for use by people with sensitive skin conditions or problems such as acne, psoriasis and excema. To make it very special you could use an extra virgin olive oil, however, be aware that extra virgin olive oil can take quite a while to trace.

Ingredients:

Olive oil = 950grams

Water = 300grams

Sodium Hydroxide = 122grams

Don't forget the basic safety instructions.

Full soapmaking instructions can be found here. Stuck as to what fragrance to use? Would you like some suggested blends of essential oils to use? Check out the Essential Oil posts for some ideas to get you started.

"I haven't the time to read through all that!"

OK... in brief...the amount of fragrance you use will vary depending upon which essential oil or fragrance you choose, but on average I would add 2% of the total of the base oils as fragrance or essential oil.

For this recipe that means 19grams - although not entirely accurate I would use a 20ml bottle of essential oil or blend to a total of 20ml in a small measuring container. Be guided by your nose though, if the essential oil you choose is very strong then you may wish to add less.

If you would like to adjust the amount of superfat in the soap then please go to the post on formulating and tailoring your own recipes and read about the benefits of this and exactly how to do it. It is not advised to simply adjust the sodium hydroxide arbitrarily.

Happy soap making!


Formulating Soap Recipes from Scratch

Many instructions for formulating soap recipes make such a meal of it you can feel overwhelmed and reduced to tears... (ask me how I know!!) If you really want to get technical or feel like studying for a chemistry degree then perhaps this isn't the right page for you. This is the easy to understand version of formulating soap recipes.

With just three basic rules you can formulate soap recipes for your particular skincare needs. I have even included a link to a very good online SAP value chart that does all the calculations for you. So although it is good to understand the rules for saponification and to be able to do the calculations yourself, it is not absolutely necessary in order to formulate soap recipes. A very basic SAP value chart is included at the bottom of the right hand column of the blog...

Firstly, when formulating soap recipes you cannot substitute oils in a recipe without re-calculating how much sodium hydroxide to use. The reason for this is that each oil has it's own SAP value. SAP stands for saponification, and the 'value' is a number that indicates how much sodium hydroxide is required to turn that particular oil into soap. The SAP values have already been determined by chemists and they are fixed, however, because the oils and fats we are using are natural there will be variations between, for example, olive oils coming from different parts of the world or produced in different seasons (grown in different soil etc.... The SAP values therefore are only approximate, but since the variations between oils from different origins is quite small, we have a way of managing - more on this later.

Secondly, when formulating soap recipes the type of oil you use in your recipe will determine the qualities inherent in the finished soap. For example: coconut oil generally gives you a very hard bar with big bubbles whereas sunflower oil gives a much softer bar with light medium sized bubbles. The qualities are determined by the fatty acids or triglycerides in the oils and fats. The greater your knowledge of these, the easier it will be for you to manipulate your recipes. But don't be put off - you can still make tailored soap with only a very rough understanding of the fatty acids in oil.

Thirdly, when formulating soap recipes please work in grams. It is so much easier to do the calculations and since accuracy is really important to the successful outcome of your recipe,there is less likelihood of you making a mistake.

OK, so you understand that in order to formulate soap recipes you need to calculate how much sodium hydroxide to use so that you can turn your chosen oil into soap.

But surely that means the amount is fixed.. why would you want to vary the amount? If you totally saponify a batch of oil to turn it into soap (that is, if you use the full amount of sodium hydroxide required to turn ALL of the oil into soap), you will get a very 'cleansing' bar.

If you deducted a small percentage of sodium hydroxide from the recipe you will get a bar of soap that contains a small percentage of 'free oil'. This bar will still cleanse but because of the free oil it would be more suitable for drier skins, which might find a totally saponified bar of soap just a little bit too harsh. But of course if you are a teenager with acne, the totally saponified bar of soap may be just the ticket - bear in mind that even though it is totally saponified it is still a much more gentle choice for washing than a mass-produced-commercially made bar of soap.

HOW MUCH SHOULD I REDUCE THE SODIUM HYDROXIDE BY? It is generally accepted among hobby soap makers that when formulating soap recipes you should always reduce by 5% in order to allow for those little variations that nature has thrown up, but you can reduce by more if you wish.

I have personally reduced the sodium hydroxide by 15% and still had a decent bar of soap that lathered well. I would not suggest that you reduce the sodium hydroxide by more than this. Unless of course you are experimenting - in which case do keep careful notes and let me know the outcome! The benefits of having such a large reduction of sodium hydroxide (it is usually called a sodium hydorxide discount) would be in the large amount of free-oil in the bar of soap making it very suitable for someone with chronic dry skin. The only downside would be that large amounts of free-oil reduce the shelf life of the soap.

The shelf life of a totally saponified bar of soap is pretty much infinite (of course fragrance may disappear as it gets older and colours will fade) but the moment you have some unsaponified oil left in the bar the clock starts ticking. Some recipes suggest you add Grapefruit Seed Extract to the soap in order to prolong the shelf life. In my experience it made no difference whatsoever and since it is expensive I do not include it in my recipes. Of course you can try it if you wish. Go by the suppliers recommendations for quantity to use.

What does a soap past it's shelf life look like? You will spot it straight away. The smell is usually of rancid fat or oil and it has a tendency to go yellow. It may still lather but it isn't exactly pleasant to use.

The calculations for formulating soap recipes are done like this...

Lets imagine that you are using a recipe that includes 100g of olive oil and 50g of castor oil and 100g of coconut oil.

You calculate each oil separately like this.

The amount of oil in the recipe multiplied by it's sap value.thus the olive oil calculation looks like this:

100(g) x 0.134 =13.4

This means that to totally saponify 100g of olive oil you would use 13.4g of Sodium Hydroxide.

Next you would calculate the castor oil:

50(g) x 0.128 = 6.25

This means that to totally saponify 50g of castor oil you would use 12.8 g of sodium hydroxide.

Next you would calculate the coconut oil:

100(g) x 0.190 = 19

Then you add all three answers together:

13.4 + 6.25 + 19 = 38.65grams of Sodium Hydroxide will totally saponify this particular combination of oils.

Do you remember we said that hobby soapmakers always reduce the sodium hydroxide by at least 5%? Well now is the time to do that.

Since most kitchen scales do not weigh down below 1gram I always round the total down to the next whole gram, therefore 38.65 becomes 38grams. Now we do the reduction by 5% = 36.1g of sodium hydroxide required. Of course I will again round it down to 36g. If you wish to increase the percentage then you can.

This process of reducing the sodium hydroxide and leaving a small percentage of free oil in the soap is called 'superfatting'.

When formulating soap recipes there is another way to superfat. The first, outlined above is all about reducing the sodium hydroxide (a caustic soda discount). The second way is to leave the sodium hydroxide at its full amount (i.e. the amount required to totally saponify the oils) and add a small percentage of extra oil or fat to the recipe. The reason why you might choose this method of superfatting is if you wish to use a small amount of a particular oil (perhaps a more expensive or more luxurious oil) in your soap. In this way you can incorporate particular qualities from a more unstable or more expensive vegetable oil without having to use large quantities of it which might upset the recipe or break the bank!

To see what kind of qualities each oil will bring to your soap you need to study the properties of the base oils.

Willy Wonka's Chocolate Soap


This is my favourite luxury soap! It is made using Venezualan Black chocolate from Mr Willy Wonka himself (those of you in the UK may have seen the Channel Four tv programme about this incredible man setting up his chocolate factory in Devon and taking on the big boys). since Mr Willy Harcourt-Cooze puts chocolate in just about everything, I thought I would put it in soap (but not too much since the chocolate is divine (and a bit expensive) and its a bit of a waste!... but certainly less calories!) Oh and its also gorgeous on your skin!

Ingredients:

Virgin (the best you can buy!) Coconut oil = 420grams

Virgin (fair trade/sustainable source) Palm oil = 290grams

Extra Virgin Olive oil = 240grams

Venezualan Black Chocolate = 20grams

Water = 250 grams

Sodium Hydroxide = 140grams

Don't forget the basic safety instructions.

You add the chocolate to the solid oils and melt them together. Otherwise follow the basic soap making instructions which you will find here.

Essential oils or fragrance is totally wasted in soap making recipes with raw ingredients as beautiful as these, please don't be tempted to add it. The smell of the fragrance would be distorted by the smell of the chocolate and other raw ingredients anyway. This amazing quality chocolate deserves only the best ingredients, hence I used Virgin coconut and Palm. The finished bar gave brown lather for a little while but that soon stopped and it was just wonderful creamy white bubbles - I suspect that it was so rich it simply needed a couple of extra weeks curing. You can buy Venezuelan Black here. It's a fun website too! If you are tempted to substitute the chocolate with another brand, make sure it's of a similar quality and cacao content or you won't get the same wonderful results!


Hot Process Soap Making


Photographs and process courtesy of Elizabeth at Gracefruit. Where you can find more recipes and loads of great ingredients too.

HOT PROCESS SOAP HAS SOME PRETTY GOOD THINGS GOING FOR IT!

Firstly because the sodium hydroxide or lye is 'cooked' during the hot process soap making, it neutralises itself much quicker than when making cold process soap. This means, in theory anyway, you can use the soap sooner... (I do find it best to leave the soap to cure for the same amount of time but it isn't strictly necessary...just my way of doing it).

Secondly... any volatile or delicate ingredients that you may add, such as essential oils or superfat oils - are added after saponification, so they are not so much affected by the sodium hydroxide.

The method requires the use of a crock pot for ease... and peace of mind... but you can do this in a double boiler too... and I know some people do it in the oven.

Just like cold process soap you melt your oils and you add the lye. Unlike cold process soap you don't have to wait for the lye to cool down... as soon as it is disolved you pop it in and give it a stir with the stick blender.

You stir it until it reaches a good thick trace don't know what that is? You need to read about making cold process soap first.

As soon as you have reached a good thick trace put the lid on the crock pot and set it to low. Then you leave it for about 30 minutes. During this time the edges of the soap (or where the pot is hottest) will begin to gel.

Keeping checking back every ten minutes or so and you will see that more and more of the soap is gelling. Until..

all the soap in the crock pot has gelled. At this point you need to remove the crock pot from the source of heat and stir to make sure that all the soap has gelled. Then you can take a small amount of the hot soap (ouch!!) out and rub it between your fingers it should feel waxy as it cools.

Now comes the bit I never do (well I did it once and didn't like it!)

The Zap Test.

This involves touching the cool soap to your tongue and if it Zaps you... i.e. if it feels like you touched your tongue with a battery then there is uncooked lye in the soap and you need to pop it back on to the heat to cook a little more.

If the soap feels fine on your tongue then its time to add fragrance and colour and anything else you fancy!

Here you can see that Elizabeth is adding some jojoba oil. Because the soap has already saponified this oil will remain as 'free oil' in the bar - which has to be nice on your skin...

Then she has removed some of the soap and coloured it green. She then adds it back into the pot and gives it a swirl.

The lightly swirled soap gets put into a mould and left to cool overnight just the same as you would with a cold process soap.

In the morning you can unmould your soap and put it somewhere to cure. As I said... curing time is cut down by this method of soapmaking but I like my bars nice and hard so I do tend to leave them the full four weeks anyway. Doesn't it look great? I wonder what it smells like?

THE DOWNSIDE TO HOT PROCESS SOAP

You may notice that the texture is not as fine as that of cold process soap (although Elizabeth has done an excellent job). Sometimes I think I used to overcook mine and it was very much like mashed potato. I should think practice is needed to get a really good finished look like these. Isn't that half the fun of it though?

Also... of course it is not as eco-friendly as cold process soap. If your electricity or gas bill is of concern (as is the future of the planet) then you may decide that this method is not for you.