Labels

Comments

I LOVE comments, so please, if you have an opinion or would like to ask a question, do so. But do check back as I shall answer any questions in the comments of the relevant post - that way, everyone can benefit from everybody's knowledge and advice.
Showing posts with label Balms. Show all posts

Monday, 11 July 2011

Antiseptic Thyme

The thyme on the allotment was fabulous this year so just as it was about to come into bloom I picked a large handful and soaked it in sunflower oil.  I covered the bowl with clingfilm and left it for several weeks...


In fact I left it until my other half got quite shirty about it hanging around the kitchen - he assumed it was for something to eat... mmm... not sure what recipe that would be. But he's well used to me dreaming up not only lotions and potions but interesting food recipes too!


Finally I sorted myself out and found the time to do something with it.  I decided on a first aid balm because thyme is a wonderful antiseptic (and because I had no balm left in the cupboard).  In fact I have a recipe for curing duck breasts in salt and thyme which clearly states that you cannot leave the thyme out because of it's antibacterial properties. 

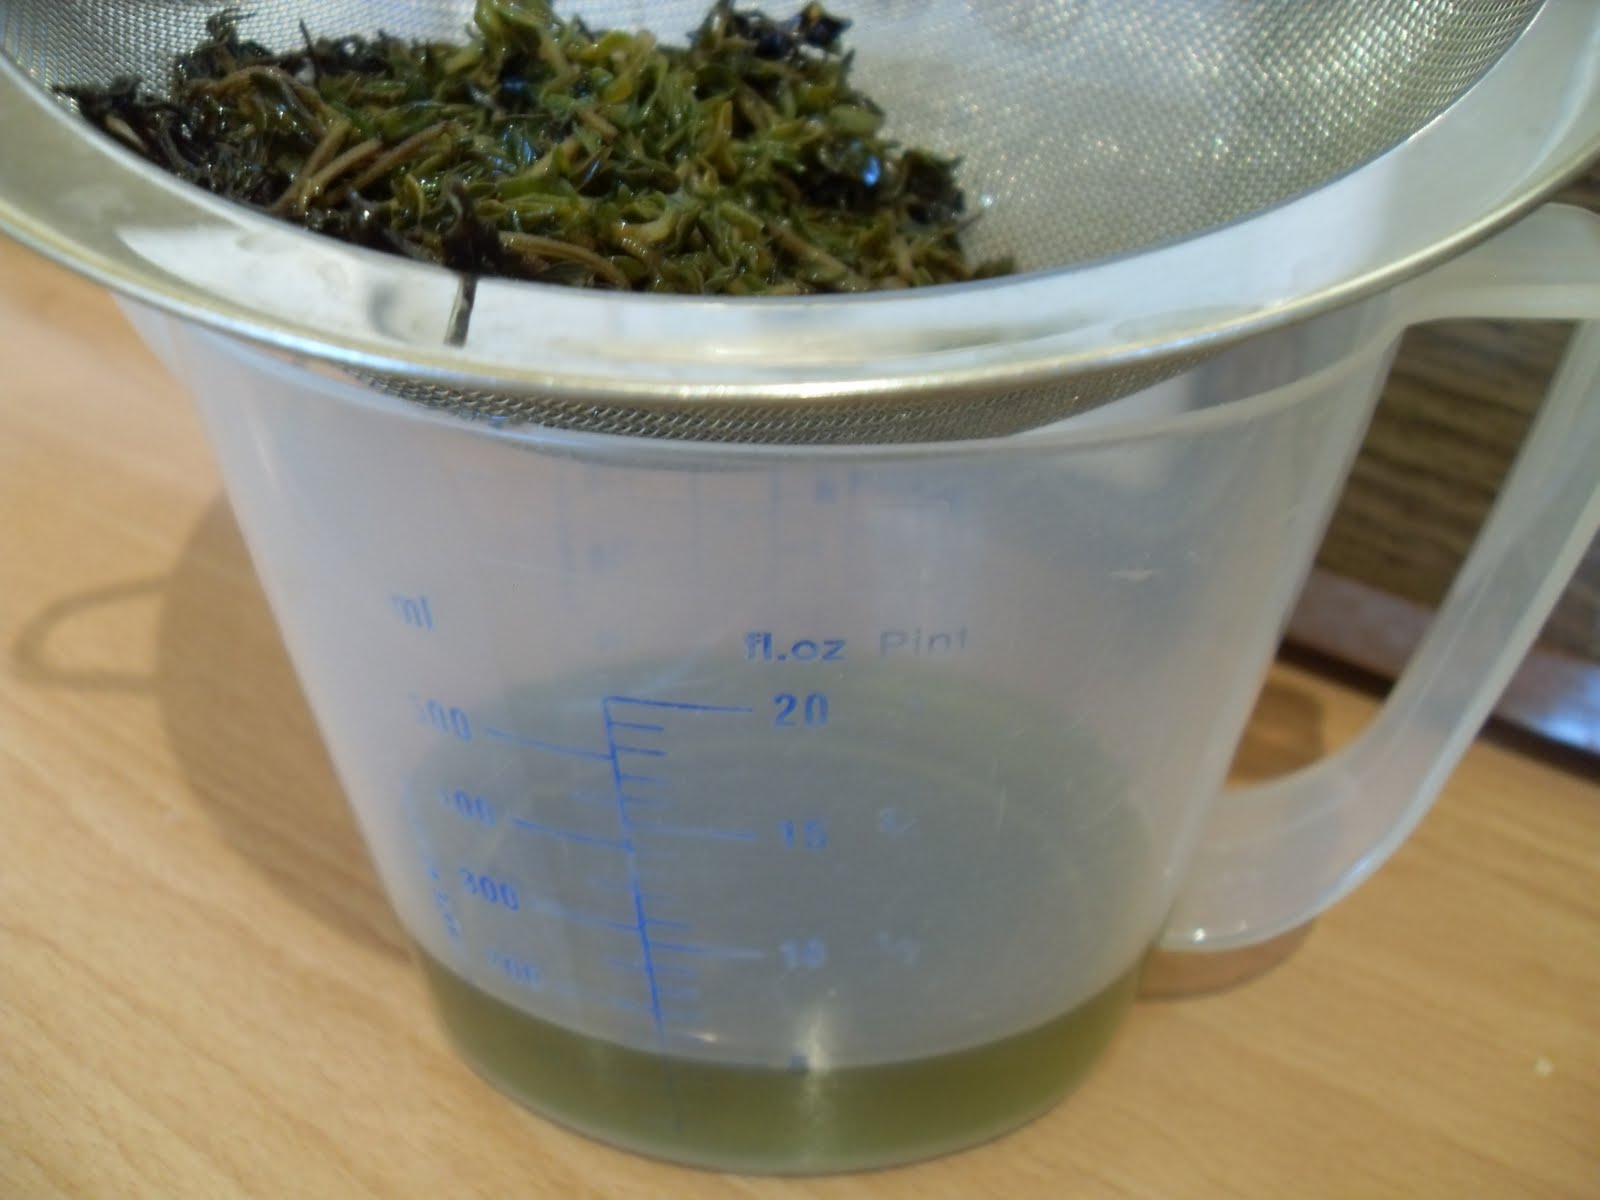
I strained the oil - for every 50ml you need 4gm of beeswax.  Look how green the sunflower oil has gone, it smelled interesting too... very much as you would expect an antiseptic lotion to smell.


I then melted the beeswax until just a small lump remained unmelted and I took it off the heat and swirled it around until totally liquid.  This beeswax was sent to me by a lady in Ireland who had won an award for the purity of her bees wax.  It's very pale in colour and has the most delicate honey-like smell.  You could use a more yellow bees wax if you want, the result will be the same, but of course the colour might be different.  Then I added the strained oil and mixed it well. 


Nothing else was required.  No essential oils, nothing.  Though you could add eo's if you want, I simply felt it was unnecessary.


I stirred it as it was cooling, speeding up the process by resting the pan in a large bowl of cold water.  It was soon like a gloopy soup.


I then scraped it into a jar and gave it a good tap on the work surface to ensure no air pockets were trapped in the mixture. 


I left it without the lid on until quite cold - you can get condensation inside the jar if you seal it up while still warm.  Then I popped on the lid and put it in the first aid cupboard, where it didn't stay very long, a walk through the weeds at the allotment produced a nasty bite on my foot - not sure which/what insect did that but the thyme ointment took the itch away instantly and ensured that it wouldn't get infected.  It's very satisfying using your own antiseptic balm.

Wednesday, 9 February 2011

De-Stressing... yes please!

De-Stress Bee Balm Recipe

This bee balm is perfect for massaging onto temples shoulders and neck at the start of a tension headache.
Ingredients
20ml Apricot Oil
10ml Calendula Oil
10ml Jojoba Oil
4g Bees Wax
1ml Vitamin E
2 drops Rosewood Essential Oil
5 drops Lavender Essential Oil
2 drops Ylang Ylang Essential Oil

Method
Follow instructions for making the basic bee balm.

It's as simple as that!


 Or.... if you want to be more complicated follow the instructions for infusing herbs in the oil - here you seem some wild thyme growing in Spain.  It was wonderfully aromatic, antiseptic and a bit stimulating for a de-stress balm, but some lavender perhaps would be more suitable for the de-stressing.  The thought, care and attention you put into making your balm will be rewarded in the results that you get.    A truly beautiful balm deserves the best therapeutic essential oils that you can afford - remember to wait until the balm is almost gloopy before mixing them in, that way you don't lose too much to the heat.  The act of massaging the oil in (either yourself or getting someone to help you) and relaxing while breathing in the aroma of the essential oils is also very important.

Tuesday, 1 February 2011

Babby Bottom Balm

Nappy Rash - The Natural Solution

Nappy rash, or diaper rash as it is known in the USA is easily prevented by the use of a barrier cream. The one's that you can buy in the chemist or supermarket always contain a preservative and often other ingredients such as synthetic fragrances that you might prefer not to put on your baby's bottom.

On this page you will find a couple of natural formulas that will do exactly the same job but without the worrying chemical ingredients. Of course if you are at all concerned about the safety of these recipes, as always, do check with your health professional before using them on your child.


Castoline

This is a barrier cream suitable for use as a nappy cream or where a vegetable replacement for Vaseline is required. It is developed from the basic Bee Balm Recipe  The end result is quite thick and it stays on the skin for quite some time before slowly sinking in. The addition of healing shea butter and soothing jojoba will help protect delicate skin.
Ingredients
40g Castor Oil
18g Shea Butter
22g Jojoba
10g Fractionated Coconut Oil
10g Bees Wax
5 drops lavender Essential oil
2 drops Chamomile Essential oil
(The use of essential oils in this recipe is optional. You may prefer - while baby is under 6 months old to leave them out, if you are in doubt please check with a qualified aromatherapist.)

Method
Combine all ingredients except the shea butter and the essential oils in a heatproof bowl over a pan of hot water. Melt everything very gently. Once the bees wax has melted remove the bowl from the heat and stir in the shea butter. The heat of the bees wax should melt the shea quite quickly. Stir it well. Allow the mixture to cool until like thick soup at which point add the essential oils, again stir very well, then pour into a clean sterilised jar. Leave for at least 24 hours to settle before use. (My hubby uses this balm on his thighs when he goes running - it really stops the chaffing and was one of my very first creations that got his seal of approval.  I was simply glowing I can tell you!!)

Monday, 31 January 2011

Varying the Basic Bee Balm Recipe


In my last post I gave you a very basic bee balm recipe, but it is the beginnings of making a really beautiful product.

First of all you need to decide what your balm is going to be used for. Then you choose a plant oil or combination of oils that will suit your purpose. Choose the type of bees wax - yes, you have a choice - that suits your purpose and finally decide if you are going to add essential oils or perhaps a flower or plant extract or both. Research the type of essential oils that will be suitable for your product and make sure that you like the way they smell. It is a good idea to blend the oils a couple of days before you intend to make the balm to allow the combination to settle down and assume a nicely rounded scent.

A note about bees wax
If you purchase bees wax from your local bee keeper you may find that it is very dark in colour, or very yellow, or has what appears to be impurities in the wax. These impurities are often simply honey, or pollen or even bits of bees - it all depends upon how well the bee keeper has filtered the wax. If you purchase bees wax from a diy store it can sometimes be very very dark brown in colour, in general the darker the colour the older the bees wax - which doesn't necessarily mean that it is bad, but you need to think about what type of bee balm you are going to use it for.

Bees wax purchased from a cosmetic supplier is sometimes pure white in colour, this is because it has been washed until it is totally white and is completely pure. Very often the yellow bees wax will smell of honey and the washed wax does not. They are usually all equally good depending upon your point of view, and your choice should be guided by your end product.

For example, if you are making a foot balm - perhaps with a peppermint essential oil, you may be perfectly happy to choose a wax from your local bee keeper who perhaps does not filter it so well. The final smell of your balm will be changed a little by the combination of the peppermint essential oil with the honey smelling wax. But if you are intending this to be a beauty balm with the addition of an expensive rose essential oil, then you may not want the wax to smell so strongly and taint the rose scent (actually rose and honey is quite pleasant but its a personal choice). Another consideration is the colour - the colour of your wax and the skincare oils that you choose will determine the final colour of the bee balm, some people are funny about using highly coloured products on their face, preferring pure white or slightly creamy rather than vivid yellow or dark brown. It is simply a consideration to be made before you begin.


A Case Study To illustrate my point I am going to divulge the secret of my own recipe Bee Calm Balm.

I wanted a medicinal bee balm to treat stings, insect bites, minor scratches and burns. I chose Calendula Oil (Calendula Officianalus Helianthus Annus - or sunflower oil infused with calendula petals). I thought that calendula would be healing and soothing and gentle on damaged skin. Because it was to be an ointment I didnt mind too much about the colour, but I would prefer yellow than brown so I spoke to a local bee keeper and bought from him a nice yellow - not too highly filtered bees wax that still smelled quite strongly of honey. Honey itself is very healing and soothing, not to mention being antiseptic, so I didn't mind if the bees wax contained traces of honey.

To further inhance the healing qualities of the oil I decided to infuse some medicinal herbs. I chose Chickweed (Stellaria media) because of it's anti-inflammatory qualities and Plaintain (Plantago lanceolata) because of it's ability to staunch bleeding. I then infused these two herbs in the calendula oil for a couple of weeks. To give my oitment a pleasing smell as well as increasing the medicinal value I chose a blend of Tea tree essential oil along with Lavender and Chamomile. I used very little tea tree because I do not find the smell pleasant, but also it is a very strong essential oil and I didn't want to overpower my formula, likewise with the chamomile - the smell is not one that I would like to dominate.

It took me some time to work out exactly how much to use. Because the calendula oil is basically an infusion of marigold petals in sunflower oil and sunflower oil can have tendencies to go off a little quicker than other oils I decided to use some vitamin e to help prolong the shelf life.

I used the basic recipe for a bee balm (given in the last post) - 50ml of oil to 4g of bees wax. The end product was brilliant!! My first aid cupboard will never be without it! So you see, the more thought and care you take over the choice of ingredients, the more amazing your end product will be.

You could choose all organic ingredients, you could mix a large number of plant oils together. You could add flower extracts or cosmetic additives - you could even reduce the amount of bees wax and replace it with a little shea butter. How much? Well that requires you to experiment a bit... if you melt shea butter and let it go hard, it goes really hard so if you were to add it to the above recipe without reducing the bees wax your balm might be rock solid, hence you need to experiment until you get the consistency that you like best. Remember to leave the preparation for a good 24 hours before judging whether it is thick or thin enough for your tastes.

Hint if you think that you will be experimenting quite a bit, it is a good idea to purchase a set of digital jewellery scales (about £20 at last time of looking). These will enable you to scale recipes down to very small quantities, in this way you can make just one pot of ointment at a time and if it is not to your liking you can bin it without too much waste!
And next... I shall be divulging my De-stress balm recipe... so do check back soon.

Sunday, 30 January 2011

Making a Basic Natural Balm

Bee Balm - Nothing could be simpler!

A bee balm is very simple to make. And has a multitude of uses depending upon your choice of plant oil. Balms can be used for cleansing very dry skin - massage on and remove with a warm damp muslin cloth.

They can be used as a skin food - use rich nourishing oils and perhaps add plant extracts or a night serum formula to enhance the effects, apply at night time or after a warm bath and allow to sink in over a period of some hours.

A balm can have medicinal purposes too, for example if you infuse a medicinal herb or plant in the oil or bees wax and then use this in your basic balm recipe. It is important to research really well which herbs to use, when in doubt always consult a professional.

Basic Bee Balm

Ingredients50ml Vegetable oil of choice (this could be a simple extra virgin olive oil or a more expensive combination of oils
from the health food shop or specialist supplier)
4g Bees Wax

Method
Melt the Bees Wax with the oil in a double boiler. Never attempt to melt the bees wax in a pan over direct heat as there is a real possibility of fire. Once the oil and wax are melted together remove from the heat and stir until it cools to the consistency of thick soup. At this point add the essential oil and stir well. As an addition a little Vitamin E can be added now – buy Vitamin E capsules from the health food shop and pierce one with a sharp pin and then squeeze the contents into the mixture – always add vitamin E when the mixture is at its coolest. Decant into a clean, sterilised pot and leave to go cold. This mixture may take a day or two to achieve its final consistency

This bee balm recipe is a nice spreadable consistency, however if you prefer your balm a little stiffer then simply either reduce the amount of oil or increase the amount of bees wax. But only by a gram or two... it makes a big difference when making such small amounts.

Thursday, 7 October 2010

Plant Oils and Their Properties

Whether you wish to formulate recipes for a luxury organic face cream or make homemade soap to combat head lice in your children's hair - there is a plant oil just perfect for the job!

When it comes to soap making, the different oils that can b e used produce different end results in the soap bar. For example Coconut oil is renowned for producing a very hard bar with big fluffy bubbles, whereas sunflower oil makes a softer bar of soap with more medium sized bubbles. You get the idea.

Once you start making your own creams and balms the oils you choose to use becomes even more important. The basis of a good balm or cream is the oil (sometimes the water too). Understanding which oils are going to benefit your skintype or be the most use for purpose in your recipe is the key to producing professional quality skincare products. Many of the oils you can use have therapeutic qualities, some are absorbed quicker than others and some will suit particular skintypes. This would be useful information right?


On top of this, you can infuse or macerate therapeutic herbs or flowers to further enhance the plant oil's properties. In this way, the same basic recipe, for a moisturiser or body lotion, can be adjusted an infinite number of times to suit all manner of people and skin conditions.

"If a thousand people take one of my skin cream recipes and decide to make it with their own choice of oil - there is a good chance that we would have 1000 individual and totally unique skin creams."

It is up to you to do a little research before you begin. Become knowledgeable about plant oils. When you come across a new oil from a supplier ask them all about it. There are simply far too many for me to list them on this site, however I have put a few here... just to get you started.

Remember, All too often everyone focuses solely on aromatherapy and they forget the amazing properties and beneficial qualities that a simple vegetable oil may have. You could save quite a lot of money too by foregoing the essential oil and concentrating on a very simple but beautiful base oil instead.