Labels

Comments

I LOVE comments, so please, if you have an opinion or would like to ask a question, do so. But do check back as I shall answer any questions in the comments of the relevant post - that way, everyone can benefit from everybody's knowledge and advice.
Showing posts with label Recipes. Show all posts

Monday, 11 July 2011

Antiseptic Thyme

The thyme on the allotment was fabulous this year so just as it was about to come into bloom I picked a large handful and soaked it in sunflower oil.  I covered the bowl with clingfilm and left it for several weeks...


In fact I left it until my other half got quite shirty about it hanging around the kitchen - he assumed it was for something to eat... mmm... not sure what recipe that would be. But he's well used to me dreaming up not only lotions and potions but interesting food recipes too!


Finally I sorted myself out and found the time to do something with it.  I decided on a first aid balm because thyme is a wonderful antiseptic (and because I had no balm left in the cupboard).  In fact I have a recipe for curing duck breasts in salt and thyme which clearly states that you cannot leave the thyme out because of it's antibacterial properties. 

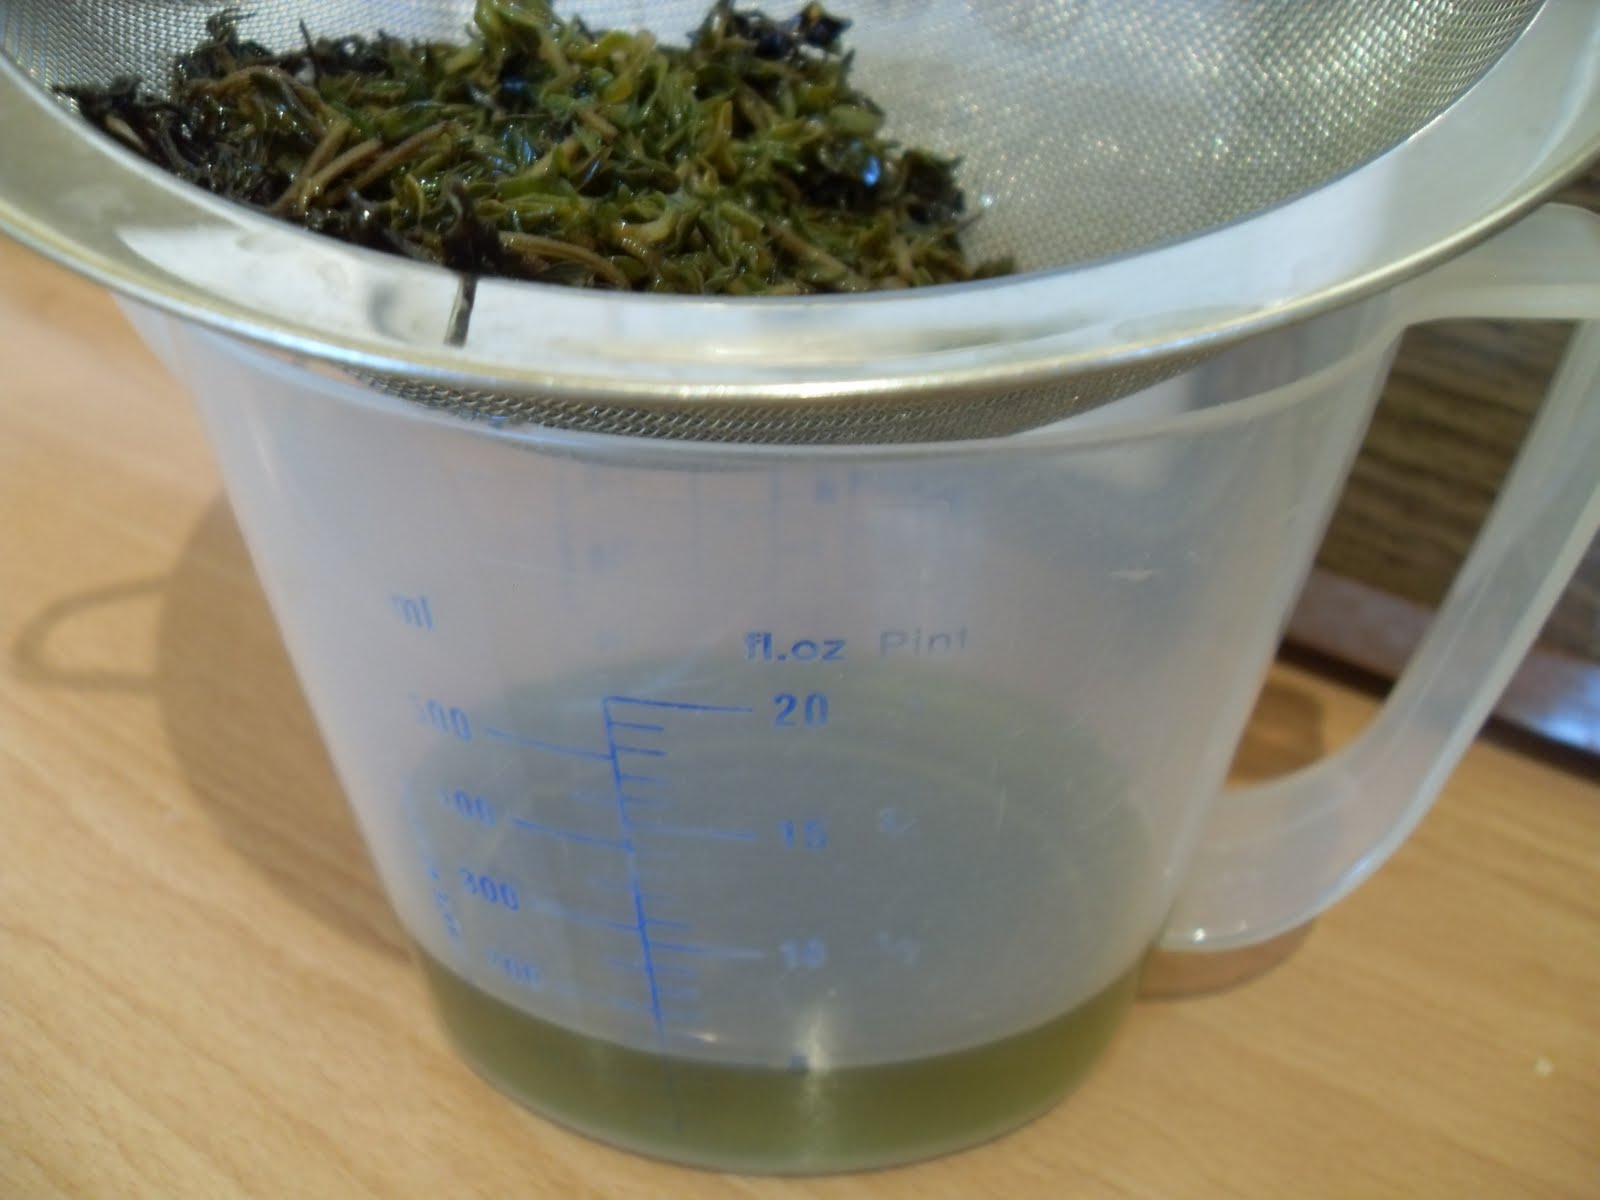
I strained the oil - for every 50ml you need 4gm of beeswax.  Look how green the sunflower oil has gone, it smelled interesting too... very much as you would expect an antiseptic lotion to smell.


I then melted the beeswax until just a small lump remained unmelted and I took it off the heat and swirled it around until totally liquid.  This beeswax was sent to me by a lady in Ireland who had won an award for the purity of her bees wax.  It's very pale in colour and has the most delicate honey-like smell.  You could use a more yellow bees wax if you want, the result will be the same, but of course the colour might be different.  Then I added the strained oil and mixed it well. 


Nothing else was required.  No essential oils, nothing.  Though you could add eo's if you want, I simply felt it was unnecessary.


I stirred it as it was cooling, speeding up the process by resting the pan in a large bowl of cold water.  It was soon like a gloopy soup.


I then scraped it into a jar and gave it a good tap on the work surface to ensure no air pockets were trapped in the mixture. 


I left it without the lid on until quite cold - you can get condensation inside the jar if you seal it up while still warm.  Then I popped on the lid and put it in the first aid cupboard, where it didn't stay very long, a walk through the weeds at the allotment produced a nasty bite on my foot - not sure which/what insect did that but the thyme ointment took the itch away instantly and ensured that it wouldn't get infected.  It's very satisfying using your own antiseptic balm.

Monday, 23 May 2011

Feet!

Apologies for the long delay in getting the promised 'foot care' post online.  Needless to say, with two allotments and the garden to boot, time is very limited at this time of year.... and if you could see the state of my feet you would wonder why I bother to post this at all!  So, it is a timely reminder to myself as well... that you really should take more care of your feet.


Pedicure

Because we often neglect them, and because they take a lot of hard wear and tear, it is true to say that many of us have particularly ugly feet.  You can be honest with yourself, look at your naked feet and decide, are they pretty or not?  If you decide the latter then it is very important to follow a foot care routine for at least 3 months in order to bring your feet up to the healthiest condition possible.  Even if you decided that your feet are pretty, in order to keep them that way a foot care routine is important.

  1. Wash your feet carefully when in the shower or bath (daily foot washing is important, twice daily if you suffer from athletes foot or any other foot maladies.  At least once a week soak the feet in a warm bath and use a pumice stone to remove dry dead skin on your heels.  Do not scrub overly at hard skin, it has taken a long time to build up and will not disappear after only one or two soakings, this will take time to remedy.  There are no shortcuts, you are in this for the long haul!  You can buy some pretty powerful creams to remove this dry skin however they also take diligence in application on a daily basis and if you stop using them the dry skin returns fairly quickly - one winter will show your feet to be the same as before, so it is wise to get into a footcare habit and simply stick to it.

  2. Occasionally you may prefer to use a sugar scrub on your feet.  This will moisturise and help remove loose flaky skin cells.  Once a month it is a good idea to use a foot mask.  This is exactly the same as using a face mask only you will choose ingredients for very dry skin.  Pop the feet in a plastic bag and put them up for 20 minutes while you watch tv or catch up on some light reading.

  3. Rinse off the foot mask with warm water and dry the feet very carefully.  Pay particular attention to the area between the toes.
     
  4. Now moisturise the feet with a rich cream or oil.  Or ask a partner or friend to do it for you, a foot massage can be very relaxing.  Raw Shea Butter is excellent for this purpose and if used at bedtime will work its magic during the night while you sleep.  It isn’t necessary however to buy a special cream or lotion for the feet, any vegetable oil such as olive, sunflower or rapeseed will work almost as well – you may need a couple of applications before bed to achieve the same results.  A pair of light cotton socks can be worn to bed to save the sheets getting oily!

Sugar Scrub for Feet

A quantity of dark brown sugar (about a handfull will do)
Vegetable oil to moisten (just enough to make the sugar like wettish sand)
4 or 5 drops of peppermint essential oil (or find a different blend to your liking - look up the essential oil links on this site for some suggestions)

Mix these ingredients together and leave covered in a bowl for a few hours to allow the essential oils to infuse properly.  Then massage the mixture onto wet feet paying particular attention to your heels and any areas of dry skin.  Take your time to do this (it is better to be sat on the edge of the bath with your feet in the bath or in the shower).  Finally, rinse your feet with warm water and pat them dry.  Follow with a good moisturiser or a moisturising foot mask.

Foot Mask Recipe 

20g Clay (Argiletz, Dead Sea Mud or Rhassoul)
1 tablespoon Jojoba Oil
Enough warm water to mix to a paste
A few drops of essential oil of your choice
To Vary
1 egg yolk and a tablespoon of honey
or
A handful of organic oats

Mix the oil into the clay and then add enough water to make a paste.  Add any extra ingredients if desired and mix well.  Apply to damp previously soaked feet, pay particular attention to areas of dry skin.  Leave for 20 minutes and then rinse.

Toe Nails
If you have ugly feet you may prefer to keep your nails as natural as possible so as not to draw too much attention to them.  Careful choice of summer shoes or style of sandals can go a long way to disguising unattractive feet.  Take the opportunity to try on lots of different styles, even ones that you normally wouldn’t want to wear.  Always look in a mirror rather than straight down at your feet to ascertain the full affect.

If your toenails are especially thick you may wish to soak the feet BEFORE cutting and filing them, however if it is easier, you may cut and trim the nails first and soak the feet afterwards.  The choice is yours.  To avoid problems with in-growing nails always cut straight across the nail.  The length of nail you leave is again your choice but for comfort when wearing shoes and socks the nail shouldn’t extend beyond the end of the toes.  File any rough edges left by the scissors or clippers.

Rub a little nail oil (recipe below) onto the surface of your nail and allow it to soak in for a few minutes.  Gently push the cuticle down to expose as much nail as is comfortable.  The surface of the nails can be polished in exactly the same way as the nails on the hand.  Buff them up vigorously for a few minutes and try on your sandals and look in the mirror.  If you decide that you would prefer a higher shine on your toes then you could apply some nail lacquer.  Clear nail varnish is pretty without drawing too much attention to the feet.  Or a French manicure, where the ends of the nails are coated with a white varnish, can give a ‘natural’ look. 

Nail Repair Oil

50% Jojoba oil
50% Avocado oil
 A few drops of Essential oils of Carrot seed and Lavender 

Combine the oils together in a bottle and apply frequently to strengthen and condition the nails.  Carrot seed essential oil is expensive but it is possible to get an olive or sunflower oil that has been macerated with carrot, this could be used instead.   
  
If you do apply a coloured varnish remember to remove it after two days and allow your toenails to breathe for at least a day before re-applying.  This is very important, nails that have been painted for too long a time are inclined to turn yellow.

Having fish eat the dead skin from your feet seems to be all the rage at the moment.  It is expensive and I think it must be effective or it wouldn't be so popular, however, I have no direct experience of it so I cannot say for sure - I would be interested in hearing from anyone who has had a go of this novel approach to footcare.  I suspect that afterwards you would still have to continue with a routine in order to keep your feet clear of dead skin so you are still back to square one really.


A Railway Incident
(Home Notes February 1895)

She sat beside me in the train,
Her eyes were shut, her face was fair,
Her lips were red as cherries ripe,
Of soft brown colour was her hair.

Her face a look of sadness wore,
I spied a tear upon her cheek.
Alas! I, too, was sad at heart,
And so resolved to speak.

“Fair maid”, I said, “I, like to thee,
Am suffering from an aching heart,
My sympathy I’d gladly give,
Then pray thy secret woes impart”.

“I thank you kindly, sir,” she said,
“I am enduring pain, tis true,
But tis no trouble with my heart,
It’s only that my boots are new!”

Tuesday, 3 May 2011

More Bicarbonate of Soda

Now that the better weather is beginning and we are considering sandals (well I am) it may almost be too late to start worrying about the look of your feet and toes (if you do want to begin a foot care regime check back regularly because my next post is about footcare).  But if you suffer from Athletes foot then using bicarb as a powder on your feet and between your toes after your shower (dry carefully first of course - even to the point of using a hair dryer on your toes for a few minutes) can be helpful.  As with all natural solutions it can take several weeks of daily application of bicarb to clear up a bad bout of athletes foot.  You should continue the treatment (daily) for several weeks after the affliction appears to have gone, this will help prevent re-infection.  After this a once a week treatment may be sufficient.


Sunburn - to relieve the pain of sun or wind burn.  dissolve 100g of bicarbonate of soda in a tepid bath and soak for about fifteen minutes.  Pat the skin dry and apply an after sun cream.

Bath Bombs - These are very popular nowadays and so easy to make at home - well I say easy, but I have often had problems with getting them to set but if they do crumble it's just as nice to put them in a bag and bash them with a rolling pin into dust - fizzy dust sprinkled onto the bath works just the same as the bath bomb.


Ingredients: 4oz bicarbonate of soda, 2oz citric acid, 1 tsp sunflower oil, approximately 10 drops essential oil. (some other recipes call for dried flowers or lavender buds etc... I hate bits floating in my bath so I leave these out).  A mould - plastic cups or silicone cup cake moulds will work.  I do not like to colour my bath bombs, preferring them natural, but any cosmetic grade colourant will work (most suppliers will advise you on which are the best - but remember when it comes to colour, less is more).  You could even give a little vegetable colourant a try just be aware that it could make your mixture a little wet (in this case work fast and use less vegetable oil).

Method:  Mix the bicarb and citric acid together well.  Add the vegetable oil and the essential oil and mix with your hands until really well incorporated.  The mixture should start to clump together when you squeeze or press it with your hands.  It should still be very crumbly and only sticking together when you squish it very hard.  Begin to pack it into your mould.  You need to really pack it tightly - squishing and squashing. Once you think you have it dense enough leave it somewhere very dry for an hour or two and then carefully remove it from the mould (a bit of gentle tapping should do it) then leave it for 24 hours in a nice dry airy place.  Your bath bomb is now ready to use or to wrap up as a gift.  If youa re giving it as a gift do remember to list the ingredients so that the recipient knows what you have put in it.

Wednesday, 20 April 2011

Bicarbonate of Soda

As I am sure most of you will know, Bicarb is a wonderful thing!  You can use it for all sorts of stuff.  When it comes to cleaning it is an excellent eco friendly product that will shift grease and grime like nobodies business.  Well this sounds great I hear you murmur.  However, what no one tells you is that you need one extra ingredient for bicarb to actually make a good job of it.  That extra ingredient is Elbow Grease.


Sadly there is no way round it, this wonderful ecologically sound method of cleaning your bathroom or kitchen only works if you are prepared to put a great deal of effort into it.  We are not so used to having to actually scrub our floors clean these days.  So many of the products available are simply wipe on and then off again.  Can you imagine how harsh they have to be to work so effectively.


You can leave a paste of bicarb and water smeared onto stubborn dirt or grease and then come back to it after a little while.  This can cut down the scrubbing a bit.  But when opting for any of these old fashioned (albeit eco friendly) cleaning tips be prepared to turn the clock back a hundred years or so and get your sleeves rolled up and your hair tied back. 


And to finish this post... some other things you can do with bicarb that don't require scrubbing. 

Chlorine damage to your hair? : Mix a solution of half a teaspoon of bicarbonate of soda to a pint of warm water and rinse your hair with it, catch the rinse in a bowl or jug and pass it through your hair several times.  This removes any smell of chlorine and can help to redress some of the damage done - but if you insist on swimming on a daily basis then you really need to wear a waterproof hat.  Bicarb can only do so much.


Dull or Dry Skin Exfoliation:  Mix a quarter of a teaspoon of bicarbonate of soda with your usual shower gel or body wash.  Make sure it is well dissolved and then apply to the skin in gentle circular motions.  Rinse well in the shower and pat the skin dry.  Follow with a luxurious body butter or lotion.  This should not be done more than once a week and a lot less if you are inclined to very dry skin.

Remember, bicarb is basically a cleaning product so although it is eco friendly, it can be a bit strong when used as part of a beauty regime.  So use sparingly and with caution.  I do have a multitude of recipes in one of my old notebooks - copied from some ancient publication no doubt.  If I can find it, I will give you a few more tips in another post.

Sunday, 27 March 2011

Viva Espagne!

Ok, so this post is about some iffy soap I made with friends in Spain.  Why was the soap iffy I hear you ask?  Well.  The whole idea was to make something cheap (therefore using local produce) and pure if possible.  The purpose of the soap was to be twofold - a cleaning product for the kitchen as well as something that you could wash your hands with.  This is a tall order as the two are usually completely separate items.

The lovely people who asked me to teach them to make soap were so enthusiastic about the whole project that we simply 'had a go' with the best ingredients that we could find in the village shop.  Sometimes you just have to do it and see what you get.

The only caustic soda that we could find was this stuff.....


It said on the packet that it was 90% caustic soda and 10% 'other ingredients'.  It did not specify which or what other ingredients were included.  I speculated that this could have been bleach or something equally horrid that you would not want to put on your skin.  Would it even turn into soap I wondered? 

The olive oil, the cheapest we could find at the village shop, turned out to be a rather good quality olive oil that I just knew would take some stirring to turn into soap.  But what the heck... lets see what happens.

Firstly I have to point out the deliberate mistake here and say BAD GIRL JANE.  BAD BAD GIRL!!!  Can you see?

I am not wearing safety goggles.  This is a huge NO NO NO!  and I debated whether to do this post at all because of it.  I hold my hands up, it was entirely my fault, my suitcase weighed in at 19.6kg when I was only allowed 20kg on the plane and I had turfed out of the case all my soap making equipment in favour of toys and clothes for my grand daughter.  So I turned the soap making experience into a very dangerous one by proceeding without the goggles.

The first problem we encountered was that the caustic soda did not entirely dissolve.  The nameless 10% was left solid at the bottom of the jug.  I carefully poured only the dissolved solution into the oils.  This means that I actually was unsure how much caustic soda I was using - likely alot less than the recipe called for (recipe given at the bottom of the post).  since I was pretty confident that it would be less caustic rather than more I thought it was worth continuing.


As predicted it took a lot of stirring.  Then we left it still liquid and had a cup of tea, checking back every ten minutes or so to give it a quick stir. After doing this a couple of times it finally started to come together, when it was the consistency of a nice creamy custard (looked just like creamy custard too!) we stirred in some out of date essential oils that my daughter had knocking about the house.  They still smelled lovely even though they were quite old - lavender and sweet orange in equal quantities. 


We poured the mixture into an empty cardboard box that we lined with greaseproof paper and then we set off for the village bar.  After a couple of hours and a couple of beers we came home and checked on it.  It was still quite runny but it was very carefully transported to Angela and Michele's house.  It was then that I realised that I had forgotten to take a photograph of the finished product.  D'oh! (must have been the beer!)


According to Angela it set beautifully by the following morning and they cut it and left it to cure.  They are now in the UK for a holiday so perhaps when they get back they can take a photograph of the soap and let me have it so I can update you all.

This type of all-olive oil soap is traditionally called a Castile soap after the Castile region in Spain where it was first made.  The final test of how good this soap is - whether it will be suitable for using on the skin or left under the sink for washing the floor will be down to Angela and Michele.  They understand that we don't really know what was in the caustic soda, or if we managed to screen out the 'bad' bits or not.  At the end of the day, if it is used solely as a kitchen cleaner, it is still going to be the cheapest kitchen cleaner you could ever buy... costing only a couple of euro's to make. 

The recipe we used:
1 litre Olive Oil (cheapest we could get)
275g water (weighed)
127g caustic soda

10ml Essential oil

Wednesday, 9 February 2011

De-Stressing... yes please!

De-Stress Bee Balm Recipe

This bee balm is perfect for massaging onto temples shoulders and neck at the start of a tension headache.
Ingredients
20ml Apricot Oil
10ml Calendula Oil
10ml Jojoba Oil
4g Bees Wax
1ml Vitamin E
2 drops Rosewood Essential Oil
5 drops Lavender Essential Oil
2 drops Ylang Ylang Essential Oil

Method
Follow instructions for making the basic bee balm.

It's as simple as that!


 Or.... if you want to be more complicated follow the instructions for infusing herbs in the oil - here you seem some wild thyme growing in Spain.  It was wonderfully aromatic, antiseptic and a bit stimulating for a de-stress balm, but some lavender perhaps would be more suitable for the de-stressing.  The thought, care and attention you put into making your balm will be rewarded in the results that you get.    A truly beautiful balm deserves the best therapeutic essential oils that you can afford - remember to wait until the balm is almost gloopy before mixing them in, that way you don't lose too much to the heat.  The act of massaging the oil in (either yourself or getting someone to help you) and relaxing while breathing in the aroma of the essential oils is also very important.

Tuesday, 1 February 2011

Babby Bottom Balm

Nappy Rash - The Natural Solution

Nappy rash, or diaper rash as it is known in the USA is easily prevented by the use of a barrier cream. The one's that you can buy in the chemist or supermarket always contain a preservative and often other ingredients such as synthetic fragrances that you might prefer not to put on your baby's bottom.

On this page you will find a couple of natural formulas that will do exactly the same job but without the worrying chemical ingredients. Of course if you are at all concerned about the safety of these recipes, as always, do check with your health professional before using them on your child.


Castoline

This is a barrier cream suitable for use as a nappy cream or where a vegetable replacement for Vaseline is required. It is developed from the basic Bee Balm Recipe  The end result is quite thick and it stays on the skin for quite some time before slowly sinking in. The addition of healing shea butter and soothing jojoba will help protect delicate skin.
Ingredients
40g Castor Oil
18g Shea Butter
22g Jojoba
10g Fractionated Coconut Oil
10g Bees Wax
5 drops lavender Essential oil
2 drops Chamomile Essential oil
(The use of essential oils in this recipe is optional. You may prefer - while baby is under 6 months old to leave them out, if you are in doubt please check with a qualified aromatherapist.)

Method
Combine all ingredients except the shea butter and the essential oils in a heatproof bowl over a pan of hot water. Melt everything very gently. Once the bees wax has melted remove the bowl from the heat and stir in the shea butter. The heat of the bees wax should melt the shea quite quickly. Stir it well. Allow the mixture to cool until like thick soup at which point add the essential oils, again stir very well, then pour into a clean sterilised jar. Leave for at least 24 hours to settle before use. (My hubby uses this balm on his thighs when he goes running - it really stops the chaffing and was one of my very first creations that got his seal of approval.  I was simply glowing I can tell you!!)

Monday, 31 January 2011

Varying the Basic Bee Balm Recipe


In my last post I gave you a very basic bee balm recipe, but it is the beginnings of making a really beautiful product.

First of all you need to decide what your balm is going to be used for. Then you choose a plant oil or combination of oils that will suit your purpose. Choose the type of bees wax - yes, you have a choice - that suits your purpose and finally decide if you are going to add essential oils or perhaps a flower or plant extract or both. Research the type of essential oils that will be suitable for your product and make sure that you like the way they smell. It is a good idea to blend the oils a couple of days before you intend to make the balm to allow the combination to settle down and assume a nicely rounded scent.

A note about bees wax
If you purchase bees wax from your local bee keeper you may find that it is very dark in colour, or very yellow, or has what appears to be impurities in the wax. These impurities are often simply honey, or pollen or even bits of bees - it all depends upon how well the bee keeper has filtered the wax. If you purchase bees wax from a diy store it can sometimes be very very dark brown in colour, in general the darker the colour the older the bees wax - which doesn't necessarily mean that it is bad, but you need to think about what type of bee balm you are going to use it for.

Bees wax purchased from a cosmetic supplier is sometimes pure white in colour, this is because it has been washed until it is totally white and is completely pure. Very often the yellow bees wax will smell of honey and the washed wax does not. They are usually all equally good depending upon your point of view, and your choice should be guided by your end product.

For example, if you are making a foot balm - perhaps with a peppermint essential oil, you may be perfectly happy to choose a wax from your local bee keeper who perhaps does not filter it so well. The final smell of your balm will be changed a little by the combination of the peppermint essential oil with the honey smelling wax. But if you are intending this to be a beauty balm with the addition of an expensive rose essential oil, then you may not want the wax to smell so strongly and taint the rose scent (actually rose and honey is quite pleasant but its a personal choice). Another consideration is the colour - the colour of your wax and the skincare oils that you choose will determine the final colour of the bee balm, some people are funny about using highly coloured products on their face, preferring pure white or slightly creamy rather than vivid yellow or dark brown. It is simply a consideration to be made before you begin.


A Case Study To illustrate my point I am going to divulge the secret of my own recipe Bee Calm Balm.

I wanted a medicinal bee balm to treat stings, insect bites, minor scratches and burns. I chose Calendula Oil (Calendula Officianalus Helianthus Annus - or sunflower oil infused with calendula petals). I thought that calendula would be healing and soothing and gentle on damaged skin. Because it was to be an ointment I didnt mind too much about the colour, but I would prefer yellow than brown so I spoke to a local bee keeper and bought from him a nice yellow - not too highly filtered bees wax that still smelled quite strongly of honey. Honey itself is very healing and soothing, not to mention being antiseptic, so I didn't mind if the bees wax contained traces of honey.

To further inhance the healing qualities of the oil I decided to infuse some medicinal herbs. I chose Chickweed (Stellaria media) because of it's anti-inflammatory qualities and Plaintain (Plantago lanceolata) because of it's ability to staunch bleeding. I then infused these two herbs in the calendula oil for a couple of weeks. To give my oitment a pleasing smell as well as increasing the medicinal value I chose a blend of Tea tree essential oil along with Lavender and Chamomile. I used very little tea tree because I do not find the smell pleasant, but also it is a very strong essential oil and I didn't want to overpower my formula, likewise with the chamomile - the smell is not one that I would like to dominate.

It took me some time to work out exactly how much to use. Because the calendula oil is basically an infusion of marigold petals in sunflower oil and sunflower oil can have tendencies to go off a little quicker than other oils I decided to use some vitamin e to help prolong the shelf life.

I used the basic recipe for a bee balm (given in the last post) - 50ml of oil to 4g of bees wax. The end product was brilliant!! My first aid cupboard will never be without it! So you see, the more thought and care you take over the choice of ingredients, the more amazing your end product will be.

You could choose all organic ingredients, you could mix a large number of plant oils together. You could add flower extracts or cosmetic additives - you could even reduce the amount of bees wax and replace it with a little shea butter. How much? Well that requires you to experiment a bit... if you melt shea butter and let it go hard, it goes really hard so if you were to add it to the above recipe without reducing the bees wax your balm might be rock solid, hence you need to experiment until you get the consistency that you like best. Remember to leave the preparation for a good 24 hours before judging whether it is thick or thin enough for your tastes.

Hint if you think that you will be experimenting quite a bit, it is a good idea to purchase a set of digital jewellery scales (about £20 at last time of looking). These will enable you to scale recipes down to very small quantities, in this way you can make just one pot of ointment at a time and if it is not to your liking you can bin it without too much waste!
And next... I shall be divulging my De-stress balm recipe... so do check back soon.

Sunday, 30 January 2011

Making a Basic Natural Balm

Bee Balm - Nothing could be simpler!

A bee balm is very simple to make. And has a multitude of uses depending upon your choice of plant oil. Balms can be used for cleansing very dry skin - massage on and remove with a warm damp muslin cloth.

They can be used as a skin food - use rich nourishing oils and perhaps add plant extracts or a night serum formula to enhance the effects, apply at night time or after a warm bath and allow to sink in over a period of some hours.

A balm can have medicinal purposes too, for example if you infuse a medicinal herb or plant in the oil or bees wax and then use this in your basic balm recipe. It is important to research really well which herbs to use, when in doubt always consult a professional.

Basic Bee Balm

Ingredients50ml Vegetable oil of choice (this could be a simple extra virgin olive oil or a more expensive combination of oils
from the health food shop or specialist supplier)
4g Bees Wax

Method
Melt the Bees Wax with the oil in a double boiler. Never attempt to melt the bees wax in a pan over direct heat as there is a real possibility of fire. Once the oil and wax are melted together remove from the heat and stir until it cools to the consistency of thick soup. At this point add the essential oil and stir well. As an addition a little Vitamin E can be added now – buy Vitamin E capsules from the health food shop and pierce one with a sharp pin and then squeeze the contents into the mixture – always add vitamin E when the mixture is at its coolest. Decant into a clean, sterilised pot and leave to go cold. This mixture may take a day or two to achieve its final consistency

This bee balm recipe is a nice spreadable consistency, however if you prefer your balm a little stiffer then simply either reduce the amount of oil or increase the amount of bees wax. But only by a gram or two... it makes a big difference when making such small amounts.

Monday, 13 December 2010

Hair Wash -

 To wash or not to Wash - The Natural approach to Haircare.

We all have to use a hair wash of some kind right? Or do we? I had suffered with an itchy scalp ever since I could remember. I had always had flakes fall onto my shoulders and I could never wear black tops. I had great difficulty in finding a shampoo or hair wash preparation that would fix this problem without causing me more problems. Gradually over the years I noticed that my hair was thinning and every day I would have to remove stray broken hair strands from my pillow.

I think I let the situation go on so long because everyone agreed that as you get older your hair gets thinner. This is true but it shouldn’t start to happen at age 40. Although we are all individuals and everyone is different, if you are in good health your hair should not start to show age related thinning until you are at least 60 +.

Because I had always used a hair wash for dry hair and also special conditioning treatments I had every reason to believe that what was happening to my hair was the normal degeneration that comes with age. Eventually I had to face facts I was losing the battle to keep up with the latest style, not only did my hair not look good, but my scalp was driving me mad with itching. Finally I snapped. I used to dream of being brave enough to shave my head and start again. Of course I didn’t shave my head. I’m truly not that brave. But I stopped washing it!

Yup! A whole 11 months of not washing my hair. And no, it did not smell - well not after the first 6 or 8 weeks. That's the difficult part. I am not suggesting that everyone would want to be as radical as this, but if you truly cannot find a shampoo to suit and you continue to have an accumulation of hair problems - then you may benefit from simply not washing your hair with any kind of shampoo or soap as I did.
That does not mean to say that I did nothing at all. I used a simple herbal hair washe made at home with herbs and flowers from the garden and the addition of some appropriate essential oils.

Non soap or Shampoo Hair Wash

IngredientsA large handful of fresh Rosemary
Two or three drops of an essential oils blend of your choice (optional)
1 litre fresh spring water. Use bottled water for this if you live in an area with harsh water.
2 tablespoons cider or apple vinegar.
Method
Place the rosemary into the spring water and bring to the boil. As soon as it starts to boil turn off the heat and put a lid on the pot. Leave it to cool to hand hot temperature. Strain the rosemary water mixture into a large jug and add the essential oil if you are using it. Add the vinegar (if you do not have cider or apple vinegar then do use whichever vinegar you have to hand... it's not that important).

How to use
Brush your hair really well for about five minutes with a good natural bristle brush. See the grooming posts for more information about brushing your hair properly.

Place a large bowl in the bath and lean over so that your head is directly above it. Pass the hair wash mixture through your hair so that it falls into the bowl beneath. Rub the scalp vigorously to dislodge any scurf and transfer the mixture collected in the bowl to the jug and repeat the process about two or three times. Dry the hair with a towel and then allow to air dry. Comb with a wide toothed comb when wet. Don't worry about the smell of the vinegar it soon goes away.

To Vary For blond hair or light coloured hair, try using chamomile flowers - or a chamomile tea - in the wash instead of rosemary.

Use this hair wash once or twice a week instead of shampoo or soap. Initially, it is best to try and avoid using heat on your hair, at least until it is healthier and stronger.

Shampoo

I say this often, but it needs repeating, would you throw a real silk blouse into the washing machine on a very hot wash? NO you would not, so why treat your hair to very hot water and lots of rubbing and squeezing and squashing?  Be gentle!!

If you feel you absolutely MUST use a shampoo then try to find a very mild one and use only a pea sized amount on your scalp. Do not worry about washing the hair shaft with the shampoo... as you rinse your scalp the detergent will latch onto the dirt as it flows down the hair shaft. So concentrate on cleaning the scalp only.  Since the scalp is naturally slightly acidic finish with a vinegar and water rinse (just like the hair wash above but you can leave out the rosemary and essential oils if you wish) which will help flush out any remaining detergent.

The real key here is to shampoo your hair only when it is absolutely essential and to use only the smallest possible amount of shampoo at a time. As a rule of thumb once a week is plenty often enough for using shampoo and even better if you can stretch it out to once a fortnight. Try using the hair wash in between times if you feel you need to.

 How to wash your hair. If your hair is short this is fairly simple, long hair is a little more complicated. It is important to first comb the hair with a wide toothed comb to make sure that it is free from tangles. You can now use a hair brush to give the hair a really good brushing and to stimulate the scalp. Wet the hair with water at room temperature. Never have the water really hot. Your hair is as delicate as a pure silk shirt…  Do not flick your hair around as you wet it, you will only tangle it. Once it is wet apply a small amount of shampoo (or soap) to the scalp and massage it well using the balls of your fingers. Do not scrape with nails. It is not necessary to create loads of foam you are only cleansing the scalp remember. Once you have given the scalp a good massaging with the shampoo, rinse with tepid water. The shampoo detergent will naturally course down your hair removing any vestige of dust or dirt adhering to the shaft of the hair. If you feel you need to repeat the process because of excess grease then do so, but repeat it in exactly the same way… even less shampoo this time since it has already cleaned most of the dirt with the first wash.


It is a good idea not to use a preparatory conditioner to start with, at least until you see what proper washing of the hair achieves. After well rinsing you need to use a towel to dry the worst of the water from your hair. If you have short hair this is fairly straightforward. With long hair, press the hair gently between two sides of towelling to remove excess drips. Do not rough up the hair as you will just tangle it and if it is weak it will break. Now you need to use the wide toothed comb once again working from the bottom to the top to remove any tangles that have occurred during the hair wash procedure.

Ideally the hair should be left to air dry as too much heat simply encourages the hair to dry out become brittle and break. If you must use a hairdryer then try it on a cool heat setting and blow it one way only so that you are not encouraging tangles. Dry the roots and the main body of the hair but try to avoid blow drying the ends.

Do not feel that you have no alternative to shampoo. You could try using a natural soap shampoo bar.

Soap

A natural soap can be a wonderful change from using a detergent based shampoo. Choose a soap that has plenty of rich oils included, preferably a soap bar especially formulated for use as a shampoo. My favourite is a super fatted soap rich in Shea butter and Castor oil. The super fatting means that there is excess oils in the soap that will be released onto the hair or skin when you use it. If your hair is naturally very oily this may not be the best hair wash solution for you but it works a treat on dry hair. A shampoo bar can leave the hair feeling thicker and rougher with less shine - depending upon your hair's natural shine ability. But over time it certainly improves the quality and strength of your hair because it is not stripping the natural oils from your scalp. It won't give you the lustrous finish that many commercial shampoos do because it does not contain any chemicals to coat the hair shaft.
Most of us feel we have to wash our hair because it is dirty, this is not usually the case. It is the scalp that is prone to become dirty not the hair and even then it is never as dirty as we imagine it to be. If hair is brushed well and regularly it is unlikely to retain much dirt or dust. So we need to find a way to wash the scalp regularly but leave the hair longer between washes. This is actually easier than it sounds. One way is to part the hair and rub the parting with a flannel which has been soaped lightly. If you keep parting the hair at regular intervals and cleaning the scalp giving the whole head a final rinse when you are finished you will find that a full shampoo is not necessary.

To try and cut down on how much detergents you use in your hair, you will need to rely on careful and considered grooming, along with a realisation and understanding of your hair's natural state. A good hair cut that takes this into consideration can go a long way towards helping you keep your hair healthy.

Rhassoul Mud

If you are happy to try a hair wash experience without any bubbles at all you might want to use Rhassoul mud. Rhassoul comes from Morocco and has been used for many generations as a hair wash and skin cleanser. It is simply a matter of wetting the mud pieces (or granules) allowing them to swell and then massaging onto a damp scalp. The mud can then be rinsed out or left for a few minutes to work in the same way as a face pack. I found that it wasn’t necessary to leave it more than a few seconds on my hair for it to do the job well and unlike many other clay formulations it rinses very easily from the hair. Both natural soap and Rhassoul have what is commonly known as the ‘Big Hair Affect’. Leaving the hair feeling and looking much thicker than usual. But like soap it leaves the hair looking a little dull.  It is worthwhile experimenting with all of the above to find out what works for you.  And once your hair is healthy and strong there is no reason why you can't return to using the occasional bought chemical product for that special look.

Tuesday, 30 November 2010

Cleopatra's Goat Milk Bath

Bathing in Goat Milk

How decadent is that? Give yourself the Cleopatra experience by mixing up your very own goat milk powder for the bath. It's easy and it helps with enumerable skin ailments. Excema is most definitely eased by gentle regular bathing in goat milk - you might like to try drinking the goat milk too if you suffer particularly badly with this. A goat milk natural soap is also a good idea, if you don't want to make your own natural soap there are a number of small hand made soap companies who specialise in goat milk products.

The fat content of goat milk is particularly high and adding it to your bath is very good for improving the texture and condition of dry or mature skin. Although it is easier kept in it's dry form you could simply pour fresh milk into the bath. Add a couple of drops of an appropriate essential oil and off you go! But you can improve on that quite a bit.


Luxury Bath Milk

Ingredients100grams Goat Milk Powder
50grams Epsom Salts
100grams Sodium Bicarbonate
2ml in total Essential Oils (or blends) of your choice. 

Method
Combine all ingredients together in a bowl and mix very well with a wire whisk or spoon. The better you mix the better the end product will be. In fact, mix some more, you really can't mix enough. Once you feel that the essential oils have been well encorporated pop the mixture into a clean, dry apothecary jar or suitable container.

Leave it for 24 hours to let the essential oils settle and then use a couple of tablespoonfuls per normal size bath. After soaking in the bath for at least 15 minutes your skin will feel beautifully baby soft and supple.

Of all my bath powder recipes this is the one that got me the most compliments from friends and relatives... and it's so easy to do!

Monday, 29 November 2010

Bath Oils with Dispersant

Using A Dispersant with your Bath Oil

A dispersant? What is that? Well, you know when you buy a bath oil and it looks milky when you pour it into the bath and feels soft on your skin but not greasy in quite the same way as oil alone. That is because a dispersant or emulsifier has been added to the bath oil.

These emulsifiers are not 'natural straight off the tree' ingredients. They are also not natures own emulsifier - bees wax. They have been synthesised in the laboratory and can include natural ingredients but are not generally thought of as 'natural'.

As such, they tend to find favour with those people who are not so strict about using all-natural ingredients, but if they are a step too far for you, then simply stick to the bath oil recipes in my previous posts.

The dispersant that I am using here is not the only one available. There are others, suppliers are usually only too happy to recommend usage levels for their products, so you can substitute another brand - usually with successful results.


The dispersant (liquid emulsifier) that I am going to use is called Polysorbate 80. It is not a totally natural ingredient. It's constituents are sorbitol, ethylene oxide & oleic acid (polyoxyethylene-20 sorbitan monooleate). Only the oleic acid is derived from vegetable oil.
Now don't be frightened by the chemical names... everything in nature has a chemical name... after all if I said it was oleic acid you would wonder what on earth that was wouldn't you? Oleic acid is a constituent of some vegetable oils.  Do not assume that because it contains synthetic ingredients, they are bad for you... similarly you shouldn't assume that all natural ingredients are good for you.  I do intend to do a post at some stage about the most commonly found cosmetic ingredients and how they fall into the natural or not category... but you will have to bear with me... these things take time!

The dispersant (polysorbate 80) helps the oil to combine with the bath water. It 'disperses' the oil  evenly through the water which helps it to reach all the parts of your body. The water looks milky and when you come out of the bath and pat your skin dry you do get the lovely soft feel of the oil but you don't get the heavy or tacky drag of neat oil on your skin.

The choice to use this ingredient is, I suppose down to where you personally draw the line.


Rose Geranium & Melissa Dispersant Bath Oil

Ingredients200 ml Avocado Oil
10ml Polysorbate 80 (you may need to Google for a supplier
near you)
1ml Vitamin E
3ml Rose Geranium Essential Oil
2ml Melissa Essential Oil

Method
In a clean sterilised glass container mix together the avocado oil and the polysorbate 80. The polysorbate 80 does not dissolve into the oil so it needs to be very well mixed through - even though you may not see it because it is the same colour as your oil. Next add the essential oils and again mix very thoroughly. The trick to successful outcomes is always in the mixing. Finally add the vitamin E. You may find using a disposable syringe for the vitamin e a good idea as often it is very gloopy and can be difficult to measure. I use disposable syringes for measuring nearly all my small ingredients by volume... of course if you are measuring by weight... you need a very accurate small set of scales... try jewelry scales... they work really well.  Plastic disposable syringes are available online from some pharmaceutical companies.

Decant the mixture into a nice bottle and label it carefully, let it rest for 24 hours before using for the first time. To use: give it a shake (just in case any of the mixture has separated... remember you may not be able to see the polysorbate because it is the same colour as the oil, before pouring a couple of teasponfuls into an average size bath. Get in and enjoy! Provided you do not get any water into the bath oil bottle you should not need to use a preservative in this mixture.

Saturday, 27 November 2010

Bath Oils

Make your own Luxury Bath Oil

Making your own bath oil is easy. Very easy. At it's most basic, a bath oil is simply a small quantity of oil poured into your bath. Done!
 
Yes, I know, as soon as you get in, all the oil sticks to the edge of the bath and stays there! Well we can do something about that... but lets keep it basic for the moment and then move on from there.

If you have chronic dry skin, there is nothing more wonderful than an oily bath. The combination of the warm water and the oil is amazing. If you keep massaging the oily water over your skin while in the bath, when you step out (carefully of course because the bath is slippery) your skin glistens. It's lovely! And it's so simple.

And don't think that you need to spend a lot of money on special oils. Sunflower oil from the cooking oils section of the supermarket will work perfectly well and so will rapeseed. Add a little lavender essential oil to it and you have a product as good as any you can buy. It really can be as simple as that.

Lets take the simple oil one step further. What if you want to infuse a medicinal herb in the oil first? Yep you can do that. Make sure that you know exactly which herb you are going to use and remember that it is important to correctly identify the herb since mother nature gives us nasty stuff as well as nice. Directions for macerating herbs in oil will be find in my previous posts under the herbs label.


If you choose an aromatic herb or flower to macerate you will get some scent in your bath oil too. But it is usually very delicate - which is fine but if you want a little more of an impact then combine your macerated oil with a complimentary essential oil blend. It is very important to make sure that you dry the herb or flower prior to macerating. Otherwise the water content in the plant ends up in your bath oil where it can start to breed germs and bacteria. Not good.

Here are a couple of basic bath oil recipes to get you started:

Rose Geranium & Ylang Ylang
Ingredients
250ml Sunflower Oil
3ml Rose Geranium Essential Oil
2ml Ylang Ylang Essential Oil

One pretty bottle (can be recycled if you wash well and sterilise first - either boiling for 5 minutes or use Milton baby sterilising tablets. Make sure it is perfectly dry before decanting the oil.


Method
In a clean glass jug or bowl mix the oil and essential oils together. Pour into a clean bottle and label. Leave for at least 24 hours before using. A teaspoonful or two is enough for an average sized bath. Don't forget to clean the bath really well when you are finished as essential oils (in any product, not just this one) can discolour your bath over time.

To Vary
Choose a different blend of essential oils. There are suggestions for essential oil blends here in some of my previous posts.


Grapefruit and Lavender Bath Oil


Ingredients
250 ml Sweet Almond Oil
2 ml Grapefruit Essential Oil
3 ml Lavender Essential Oil

One pretty bottle (can be recycled if you wash well and sterilise first - either boiling for 5 minutes or use Milton baby sterilising tablets. Make sure it is perfectly dry before decanting the oil)

Method
In a clean glass jug or bowl mix the oil and essential oils together. Pour into a clean bottle and label. Leave for at least 24 hours before using. A teaspoonful or two is enough for an average sized bath. Don't forget to clean the bath really well when you are finished as essential oils (in any product, not just this one) can discolour your bath over time.  Decorate your bottle with a spray of lavender tied with raffia and you have a wonderfully unique gift.

To Vary
Choose a different blend of essential oils. Choose a different vegetable oil.

Next Post:  Using a dispersant to blend your bath oil - no more oil stuck to the sides of the bath.

Friday, 26 November 2010

Shea Butter for the Bath

Shea Butter Bath Soak for Dry Skin

This is truly the height of luxury and extravagance as well as being the most glorious gourmet feast for dry, parched skin!
Ingredients
100g Organic Shea Butter (the shea butter should be a pale cream to white colour and smell slightly nutty as well as being pliable or crumbly in texture)

250g Sea Salt Flakes (if you can only buy the salt in large chunks then you will need to whizz it for a while in a food processor or liquidiser in order to grind it a little finer)

5ml Rose Otto Essential Oil

1 tsp of dried rose petals ground to a powder (combine them with the sea salt in the food processor or use a pestle and morter to get the petals as fine as possible). This is optional

Method
Using a metal spoon begin by creaming the shea butter in a bowl until it is very creamy in texture. Add the salt a little at a time along with the rose otto essential oil. Continue to cream it together until all of the salt and shea butter are combined. Decant into a jar and allow to rest for at least 24 hours before use. Don't forget to include the ingredients on the label along with instructions for use. i.e.  Crumble a teaspoon or two under a running tap into a normal size bath of warm water. Soak for at least 15 minutes and then pat the skin dry. Be careful on exiting the bath as the shea butter could make it slippery.

To Vary  Any type of salt or combination of salts could be used and any essential oil or blend of essential oil. For suggestions of blends of essential oils go to the Aromatherapy and related pages.


Thursday, 25 November 2010

Detox Bath Salts

The detoxifying effect of epsom salts is truly amazing - although to work really well you need to use very large quantities of epsom salt (and this should not be done if you suffer from high blood pressure), even a small amount used regularly seems to have a cumulative effect.
Ingredients
500g Epsom Salts
zest of one unwaxed lemon (optional)
5ml Rose Geranium essential oil
5ml Lemon essential oil
1 tsp of Calendula petals (Pot Marigold petals) (optional)

Method
Mix the zest of the lemon into the epsom salts in a glass or china bowl. Add the calendula petals if you are using these. Combine the essential oils and mix with a wire whisk into the salt. Mix really well - the art of good bath salt making is in the mixing.

Decant the salts into a jar or container and decorate and label. Don't forget to put the ingredients on the label and the directions for use: 1 tablespoon of salts poured under running water in an average size bath is sufficient.

To Vary
10ml of Vegetable oil or Liquid Glycerine can be added to this recipe. It makes the salts slightly sticky and less free-flowing but don't let that put you off. If you have dry skin choose a suitable oil from the skincare oils post and allow the salts to dry on greaseproof paper for 24 hours before putting them into the jar.   Or

Use the zest of an orange and combine with sweet orange essential oil.

Wednesday, 24 November 2010

Bath Salts as Gifts

Whichever type of salts you decide to use as your base ingredient for your bath salts recipe - this has got to be the easiest and most effective homemade beauty recipe on this website! All you need is a fancy jar to put them in and a little ribbon or lace and you have a delightfully aromatic gift. Don't know what to give your child's teacher at the end of term? Well look no further...

Basic Lavender Bath Salts

Ingredients200g Coarse Sea Salt
200g Epsom Salts
100g Dead Sea Salt
5ml liquid Glycerine (optional)
10ml Lavender Essential Oil

Method
Combine the salts together in a glass or china bowl or jug. Do not use plastic bowls or spoons since the essential oils can discolour these. (And always remember to clean the bath thoroughly after using the salts since prolonged use of essential oils can discolour your bath too!)

Sprinkle on the lavender essential oil and liquid glycerine if using. With a wire whisk carefully mix the ingredients until everything is well combined. Mix really well. The better you mix the better the end product. If you have used liquid glycerine the salts mixture may feel a bit wet or sticky. If so, you can dry them by spreading them onto greaseproof paper and leave for 24 hours.

Pack the salts into a fancy apothecary jar or container and label it. Include ingredients on your label in case the person you are giving them to is allergic to anything and directions for use. i.e. A tablespoon of scented bath salts poured under running water is plenty for an average bath.

A single sprig of fresh lavender can be inserted into the jar for decoration. I tend not to include actual lavender buds in any of my recipes since they do not look nice once they are floating on the top of the bathwater, however if you like this sort of thing, remember less is better... you don't want it to look like a swarm of ants in your bath!

Leave the salts in the jar for at least 24 hours to allow the essential oil to settle down before using in the bath.

To Vary
Absolutely any pleasant smelling essential oil or blend of essential oils can be used in this recipe. Just be guided by your nose... if it is a very strong smelling essential oil then you may wish to use slightly less than the recommended 10ml.

The liquid glycerine can be replaced with a similar quantity of vegetable oil - choose one that suits your skintype.There are plenty of suggested essential oil blends in one of my earlier posts (just click on essential oils on the label cloud above) and more information about vegetable and plant oils for use in skincare... again look for the label that applies and click.

Coming up next a recipe for detox bathsalts.

Tuesday, 23 November 2010

Epsom Salts

 A Miracle Cure that Seems to Work!

Epsom salts or more accurately Magnesium Sulphate is the second-most abundant element in human cells and the fourth-most important positively charged ion in the body, so it's little wonder this low-profile mineral is so vital to good health and well being. Magnesium, the major component of Epsom Salts, also helps to regulate the activity of more than 325 enzymes and performs a vital role in orchestrating many bodily functions, from muscle control and electrical impulses to energy production and the elimination of harmful toxins.
Believe it or not but you can increase your magnesium levels from soaking in a bath enriched with magnesium sulphate crystals, commonly known as Epsom Salt. Information obtained from The Epsom Salts Council.


Finding epsom salts in reasonably large quantities is often tricky, the chemist usually sells it in 50g to 100g quantities, which is really too small for bath salt making.You should try Googling for a mail order company that sells it in 2kg packs or more - anything less is really not useful.

When I was a child, Epsom Salts were used in my home as a cure for the common cold. A very hot bath laced with a large handful of Salts was prepared, the idea being to immerse in it for as long as it was possible, with top-ups of very hot water to ensure that the temperature of the body was kept high. Copious sweating is the result. After a while the sick person is dried off and wrapped in thick blankets and put to bed with a warm bedpan for company and hot toddy (whisky, lemon and hot water... if you were an adult), the sweating no doubt continues and upon waking in the morning the cold has miraculously disappeared. 

We now know that extremely hot water is not good for the skin, it accelerates the aging process and should be avoided if at all possible. But certainly Epsom salts dissolved in the bath in large quantities will make you sweat copiously and I know in our house many a cold was cured in this way. (NB. It is not a good idea to use very heavy doses of salts in your bath if you suffer from high blood pressure or a heart condition, if in doubt check with your doctor). 

While increasing your magnesium levels, Epsom Salt also delivers sulphates, which are extremely difficult to get through food but which are readily absorbed through the skin. Sulphates serve a wide variety of functions in the body, playing a vital role in the formation of brain tissue, joint proteins and the mucin proteins that line the walls of the digestive tract. Sulphates also stimulate the pancreas to generate digestive enzymes and are believed to help detoxify the body's residue of medicines and environmental contaminants.

A variety of factors contributes to a magnesium deficiency. Intensive farming practices deplete magnesium from the soil, and magnesium is not a standard component in most fertilizers. Therefore, a diet that would have supplied enough magnesium a century ago may not supply enough today.

Of course it isn't simply the salts that work their magic on you. Full immersion of the body in water at least once a week is, in my opinion, a necessity for continuing good health. There are documented health benefits to full immersion (hence the continuing popularity of spa’s and resorts like the dead sea) however few of us have access to a bath large enough for this in our own homes. Discounting any medical benefits, bathing is mentally calming and restorative, a bath before bed helps aid restful sleep and promotes a feeling of well being. For more information on water and it's benefits take a look at the post on toning the skin.

It may be a tall tale that Archimedes leapt out of the bath shouting eureka ‘I’ve found it!’, but it is very understandable. How many really good ideas surface while lounging in a warm bath? It is a truly meditative environment which can effect not only the health of the body but also the soul – and sometimes it’s the only place to get any peace from our busy lives.


I do not agree with taking the mobile phone into the bathroom, I also do not think you should be able to see a television from the bathtub! A little restful music, or even thought provoking radio will not interrupt or spoil the occasion in any way and adding a beneficial substance to the water can only enhance the experience.

Use Epsom salts alone or mixed with appropriate essential oils to help with jetlag, vdu stress and general overwork and tiredness. Although the amount required is actually quite large. I have found that even very small amounts taken in a regular daily bath will have a cumulative effect. If you have any health concerns at all do check with your health professional.

Tuesday, 9 November 2010

Bath Melt Recipe

Making a Bath Melt Could Not Be Easier!

A bath melt is definitely one of the easiest toiletry recipes to make at home. They are solid at room temperature and so can be stored in the bathroom cabinet ready to use. The principle is the same for all the recipes - you may find that only the base oil and essential oils change.

Use a cookie mould (mold) to set the melt or any other container that you think will give you the correct size. Some moulds intended for melt and pour soap also make good containers for melts.

Remember when you use the melt, the bath will become slippery so you should always exercise caution when getting in or out - and if you use essential oils do clean your bath thoroughly afterwards as they can discolour the bath!

Pam's Lavender Cocoa Butter & Honey Bath Melt

This was the very first bath melt recipe I invented. The lady it was created for worked with me at the time and suffered from chronic dry skin. She was delighted with the resultsIngredients
85g Cocoa Butter
5g Sweet Almond Oil
5g Honey
5g Powdered oatmeal
2ml Lavender Essential Oil  

Method
Place all ingredients except the essential oils into a bain marie over a low heat until melted. A bain marie is a pot of water on the cooker top with another pot inside. You place the ingredients into the smaller pot and allow the heat from the water in the pot below to melt them. In this way the ingredients do not come into contact with direct heat.


Once the mixture has melted remove it from the heat and allow to cool until thick before adding the essential oils. Stir well and then pour into patty tins or something suitable for use as a mould. Cup cake papers can be nice too! Place the melts into the refrigerator to go hard. These bath melts do not set totally solid because of the honey, they were a bit like soft fudge.  If you prefer a harder product then simply leave out the honey from the recipe.To use
Crumble a small amount into the warm bath. It is not necessary to use the whole thing in one go (although you can if you want to!) In this way it will last for as many as three or four baths.

The above recipe is quite a small amount, but it is best to trial a small quantity first to make sure that you like it. If you do, you can always increase the recipe size for the next time!
To Vary Use different essential oils (check out the blends suggested in my more recent posts) or change the sweet almond oil for something more suited to your skin type.

Monday, 8 November 2010

Useful Essential Oils by Skin type and Recipes for Blending

 Aromatherapy Recipes


Quantities to Use

All recipes are given in 'parts'... i.e. one part lavender to two parts patchouli etc... in this way you can scale up or down the size of your recipe to suit your own needs. You will find that most soap recipes contain between 1% and 3% (of the base oils) essential oil along with most other wash-off products such as shampoo or shower gels or bath oils. Products that will sit on the skin for long periods of time and/or be absorbed in total contain much less - usually 1% or less. Be guided by smell on this too. Strong smelling concoctions are used in smaller quantities than more delicate smelling ones, though neither should exceed the recommended dose.Aromatherapists work with so many drops per mls of base product. Some of the recipes reflect this, other's are brazenly simply for scent and will be used up to the maximum allowed by law.

Hint make up a very small quantity of the mixture and allow it to settle for 24 hours and then smell it. Now you can decide if you like it well enough to use in your product.

The Most Common Essential Oils and their uses (in brief)

1. LAVENDER Lavendula angustifoliaSuits all skintypes, acne, burns, inflammations, athletes foot, insect bites and stings, sunburn, wounds, depression, headache and stress-related conditions.
2. ROSE OTTO Rosa damascena
Thread veins, dry skin, eczema, poor circulation, depression and stress-related conditions.
3. BERGAMOT Citrus bergamia
Anxiety, depression, uplifting emotions. Caution: not to be used prior to exposure to sunlight, unless you purchase Bergamot FCF which is bergaptene free.
4. BLACK PEPPER Piper nigrum
Muscular aches and pains, poor circulation, mental fatigue. Caution: Avoid if you have sensitive skin
5. CEDARWOOD Cedrus atlantica
Acne, exzema, psoriasis, oily skin and hair, hair loss, dandruff, nervous tension and stress-related disorders. Caution: Not to be used during pregnancy
6. CYPRESS Cupressus sempervirens
Oily skin conditions, excessive perspiration, vricose veins, wounds, fluid retention.
7. EUCALYPTUS Eucalyptus globulus
Skin infections and wounds, muscular aches, colds and flu, hedaches, mental fatigue.
8. FRANKINCENSE Boswelliaa carteri
Mature skin, scars, wounds, anxiety and stress.
9. GALBANUM Ferula galbaniflua
Acne, scars, wounds, inflamed skin, muscular aches, nervouus tension and stress-related disorders. Caution: Not to be used during pregnancy
10. GERANIUM Pelargonium graveolens
Congested skin, poor circulation, dermatitus, eczema, burns, head lice, cellulite, nervous tension.
11. GRAPEFRUIT Citrus X paradisi
Cellulite, depression, nervous exhaustion, colds and flu. Caution: Do not use prior to exposure to sunlight
12. JASMINE Jasminum officinale
Nervous exhaustion, mature skin, depression, stress-related conditions.

13.JUNIPER Juniperus communisAcne, eczema, oily skin conditions, cellulite, hair loss. Caution: Not to be used during pregnancy
14.LEMON Citrus limonum
Oily skin conditions, cellulite, poor circulation, colds and flu, depression. Caution: Do not use prior to exposure to sunlight
15. MANDARIN Citrus reticulata
Stretch marks, cellulite, digestive problems, insomnia.Caution: Do not use prior to exposure to sunlight
16. MARJORAM Origanum marjorana
Bruises, muscular aches, pms, migraine, colds and flu. Caution: Not to be used during pregnancy
17. MYRRH Comminphora myrrha
Athletes foot, maature skin, wounds, respiratory disorders, nervous tension. Caution: Not to be used during pregnancy
18. NEROLI Citrus aurantium var amara
Most skin types, stretch marks, poor circulation, anxiety, stress-related disorders.
19. PALMAROSA Cymbopogon martinii var. martinii
Acne, minor skin infections, scars, nervous exhaustion.
20. PATCHOULI Pogostemon cablin
Acne, athletes foot & fungal infections, dndruff.
21. PEPPERMINT Mentha piperita
Cold and flu, fainting, headache, migraine, mental fatigue. Caution: May irritate sensitive skin.
22. PETITGRAIN Citrus aurantium var. amara
Oily skin conditions, stress-related disorders.
23. ROSEMARY Rosmarinus officinalis
Dandruff, oily skin and hair, head lice, muscular aches, nervous exhaustion and mental fatigue. Caution: to be avoided if you suffer from epilepsy.
24. SANDALWOOD Santalum album
Dry skin conditions, Oily skin conditions, acne, depression, insomnia.
25. VETIVER Vetiveria zizanoides
Acne, oily skin conditions, wounds, muscular aches.
26. YLANG YLANG Cananga odorta var. genuina
Promotes hair growth, high blood pressure, palpitations, nervous tension.
27. CHAMOMILE ROMAN Anthemis nobilis
Acne, allergies, eczema, inflamed skin, burns, stress-related conditions.
28. GINGER Zingiber officinale
Aches and pains, poor circulation, nausea, travel sickness, nervous exhaustion.

This is most definitely not an exhaustive list of essential oils. But the 28 listed are more than enough for any amateur cosmetic formulator. If, however you wish to go on to developing aromatherapy recipes or perfumes you my find you need a few more. For increasing your aromatherapy knowledge with a view to alternative therapy you would be advised to seek out further in-depth information or go on a college course.

 Useful Essential Oils by Skintype

Dry Skin Roman Chamomile, Geranium, Lavender, Patchouli, Rose Otto.Oily Skin Cedarwood, Lemon, Ylang Ylang, Lavender.
Mature Skin Clary Sage, Frankincense, Rose Otto, Lavender.
Anti-Aging Clary Sage, Frankincense, Lemon, Rose Otto, Lavender.
Sensitive Skin Rose Otto, Lavender, Roman Chamomile.
Hair Care Cedarwood, Clary Sage, Rosemary, Lavender, Lemon, Juniper, Ylang Ylang, Tea Tree, Peppermint.
Nail Care Geranium, Lavender, Tea Tree, Lavender, Tea Tree.

The following Aromatherapy Recipes have been formulated primarily for their skincare benefit.

Aromatherapy Recipes for Normal SkinRoman Chamomile = 1 part
Geranium = 1 part
Lavender = 3 parts
XXXXXXXXXXXXXXXXXXXXXXXXXXXXX
Lavender = 3 parts
Neroli = 2 parts
XXXXXXXXXXXXXXXXXXXXXXXXXXXXX
Aromatherapy Recipes for Dry Skin
Rose Otto = 1 part
Sandalwood = 3 parts
XXXXXXXXXXXXXXXXXXXXXXXXXXXXX
Roman chamomile = 1 part
Lavender = 4 parts
XXXXXXXXXXXXXXXXXXXXXXXXXXXXX
Aromatherapy Recipes for Oily Skin
Frankincense = 2 parts
Cedarwood = 3 parts
XXXXXXXXXXXXXXXXXXXXXXXXXXXXX
Patchouli = 1 part
Frankincense = 1 part
Lavender = 2 parts
Aromatherapy Recipes for Combination Skin
Frankincense = 1 part
Lavender = 2 parts
Geranium = 1 part
XXXXXXXXXXXXXXXXXXXXXXXXXXXX
Roman Chamomile = 2 parts
Geranium = 2 parts
XXXXXXXXXXXXXXXXXXXXXXXXXXXX
Aromatherapy Recipes for Sensitive Skin
Rose Otto = 1 part
Lavender = 1 part
XXXXXXXXXXXXXXXXXXXXXXXXXXXX
Aromatherapy Recipes for Thread Veins
Roman Chamomile = 1 part
Neroli = 1 part
Gernium = 1 part
XXXXXXXXXXXXXXXXXXXXXXXXXXXX
Cypress = 2 parts
Frankincense = 1 part
XXXXXXXXXXXXXXXXXXXXXXXXXXXX
Aromatherapy Recipes for Anti-aging
Sandalwood = 4 parts
Frankincense = 2 parts
XXXXXXXXXXXXXXXXXXXXXXXXXXXX
Myrrh = 1 part
Rose Otto = 1 part
XXXXXXXXXXXXXXXXXXXXXXXXXXX
Neroli = 2 parts
Geranium = 1 part
Myrrh = 1 part

The combinations of essential oils to make aromatherapy recipes are pretty much boundless. Especially if you are unconcerned with the therapy side of things and want to concentrate on making a delightful scent - which in itself will have beneficial results simply because of being enjoyable.

So... why don't we start using some of these recipes.  How about a Bath Melt?  Don't know what that is?  Well you better come back for the next post then!